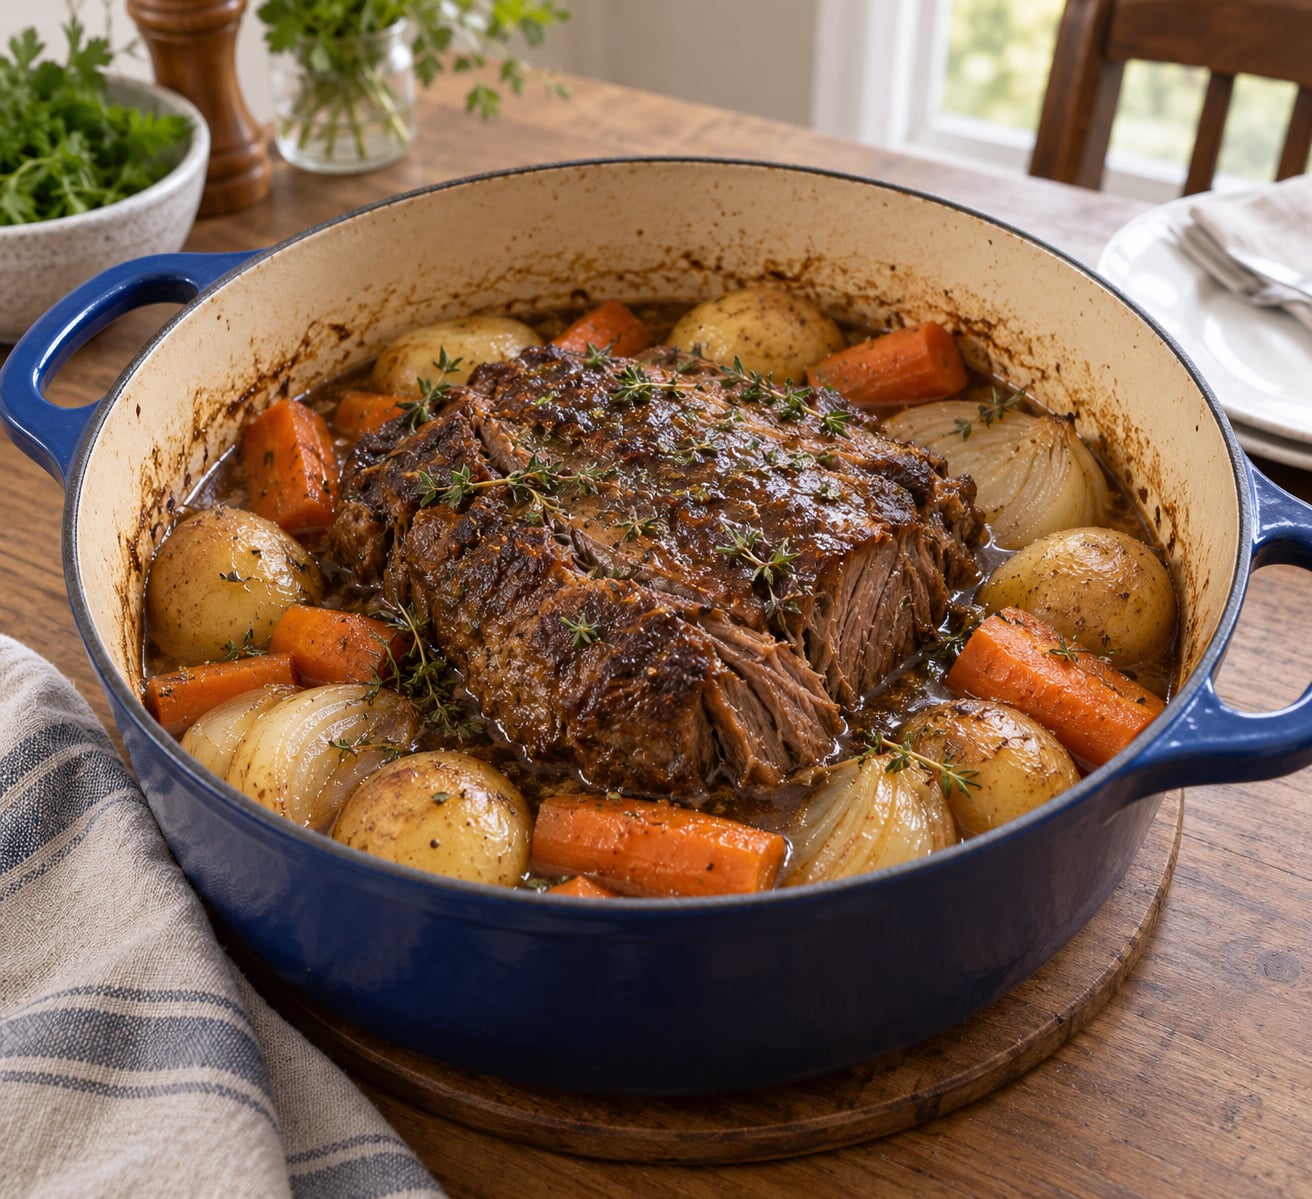
Dutch oven pot roast is a 3-to-4-pound chuck roast seared in hot oil, then braised covered at 300°F for about three to four hours until it shreds under a fork, with the drippings thickened into a pan gravy. Hands-on work is roughly 30 minutes; the oven handles the rest while you get on with your day.
The Dutch oven is doing real work here, not just holding liquid. Enameled cast iron stores heat and then gives it back evenly, and the tight lid traps steam so the roast cooks in its own moisture instead of drying out. That slow, wet heat is what converts collagen into gelatin, and gelatin is the difference between meat you slice and meat you pull apart with a fork.
Here is the short version before the detail:
- Prep: about 30 minutes
- Cook: 3 to 4 hours at 300°F, covered
- Serves: about 6
- Beef: 3 to 4 lb boneless chuck roast
- Pot: 6 to 8 quart oven-safe Dutch oven with a tight lid
Table of Contents
- What You Need
- Ingredients
- Choosing the beef
- Choosing your braising liquid
- Step-by-Step
- How to make pot roast in a Dutch oven: Prepare the beef
- How to make pot roast in a Dutch oven: Brown the beef
- How to make pot roast in a Dutch oven: Add vegetables and liquid
- How to make pot roast in a Dutch oven: Braise until tender
- How to make pot roast in a Dutch oven: Rest and serve
- Common Mistakes and How to Fix Them
- Frequently Asked Questions
- How long does pot roast take in a Dutch oven?
- What temperature should I cook pot roast at in a Dutch oven?
- What cut of beef is best for Dutch oven pot roast?
- How do I know when pot roast is done?
- Do I have to brown the beef before making pot roast?
- Can I make Dutch oven pot roast ahead of time?
- Conclusion
What You Need
You do not need a Dutch oven specifically. Any heavy oven-safe pot with a lid that fits well will braise a chuck roast, and a slow cooker does the same job minus the crust. The Dutch oven is worth having because it goes straight from stovetop to oven, which means you can sear the beef and then braise it in the same pot with nothing to wash in between.
Two checks before you start. Confirm your pot is oven-safe, especially if it is bare cast iron rather than enameled, and check that the lid sits flat on the rim. A Dutch oven with a warped or glass lid that rattles will vent steam, and you lose the moist environment that makes this cut work.
For size, a 3-to-4-pound roast needs a 6-quart pot with room for the meat and about two inches of vegetables around it. A 5-to-6-pound roast needs an 8-quart pot. If your pot is tight, the meat sears unevenly and the vegetables steam into mush instead of roasting.
Ingredients
- 3 to 4 lb boneless chuck roast, trimmed of excess fat
- Kosher salt and coarse ground black pepper
- 2 tbsp neutral oil such as canola or avocado
- 1 large onion, cut into thick half-rings
- 4 garlic cloves, lightly crushed
- 2 tbsp tomato paste
- 2 cups beef broth, plus more if needed
- 1 cup dry red wine, or use 3 cups broth in place of the wine
- 1 tbsp Worcestershire sauce
- 2 bay leaves and a few sprigs of fresh thyme
- 1 lb Yukon gold potatoes, cut into 2-inch chunks
- 3 carrots, cut into 2-inch chunks
- 2 tbsp cornstarch mixed with 1/4 cup cold water
- Fresh parsley for serving, optional
Choosing the beef
Chuck is the right cut because it is loaded with connective tissue that turns to gelatin under moist heat. Bottom round is leaner and cheaper, and it will go tough if you push the cook too long, so treat it as a 90-minute roast rather than a three-hour braise. Rump is workable if you keep the temperature at 275°F and cut it across the grain when you serve it. Brisket works too, but it needs more liquid and a shorter cook to stay tender.
Choosing your braising liquid
Beef broth gives the most savory result and keeps the dish tasting like beef. Red wine adds acidity and depth, and half wine and half broth is the balance I use most often. Chicken broth works despite the objection that it sounds wrong in a beef dish, and it does produce a very good gravy, lighter in body than beef broth. Tomato paste stirred into the drippings before the liquid goes in adds body and a slight sweetness, which is why it appears in most restaurant versions.
Whatever you use, the liquid should come roughly a third of the way up the side of the roast. It will rise as the cap releases and as vegetables release their own water. More than that and you are boiling rather than braising.
Step-by-Step
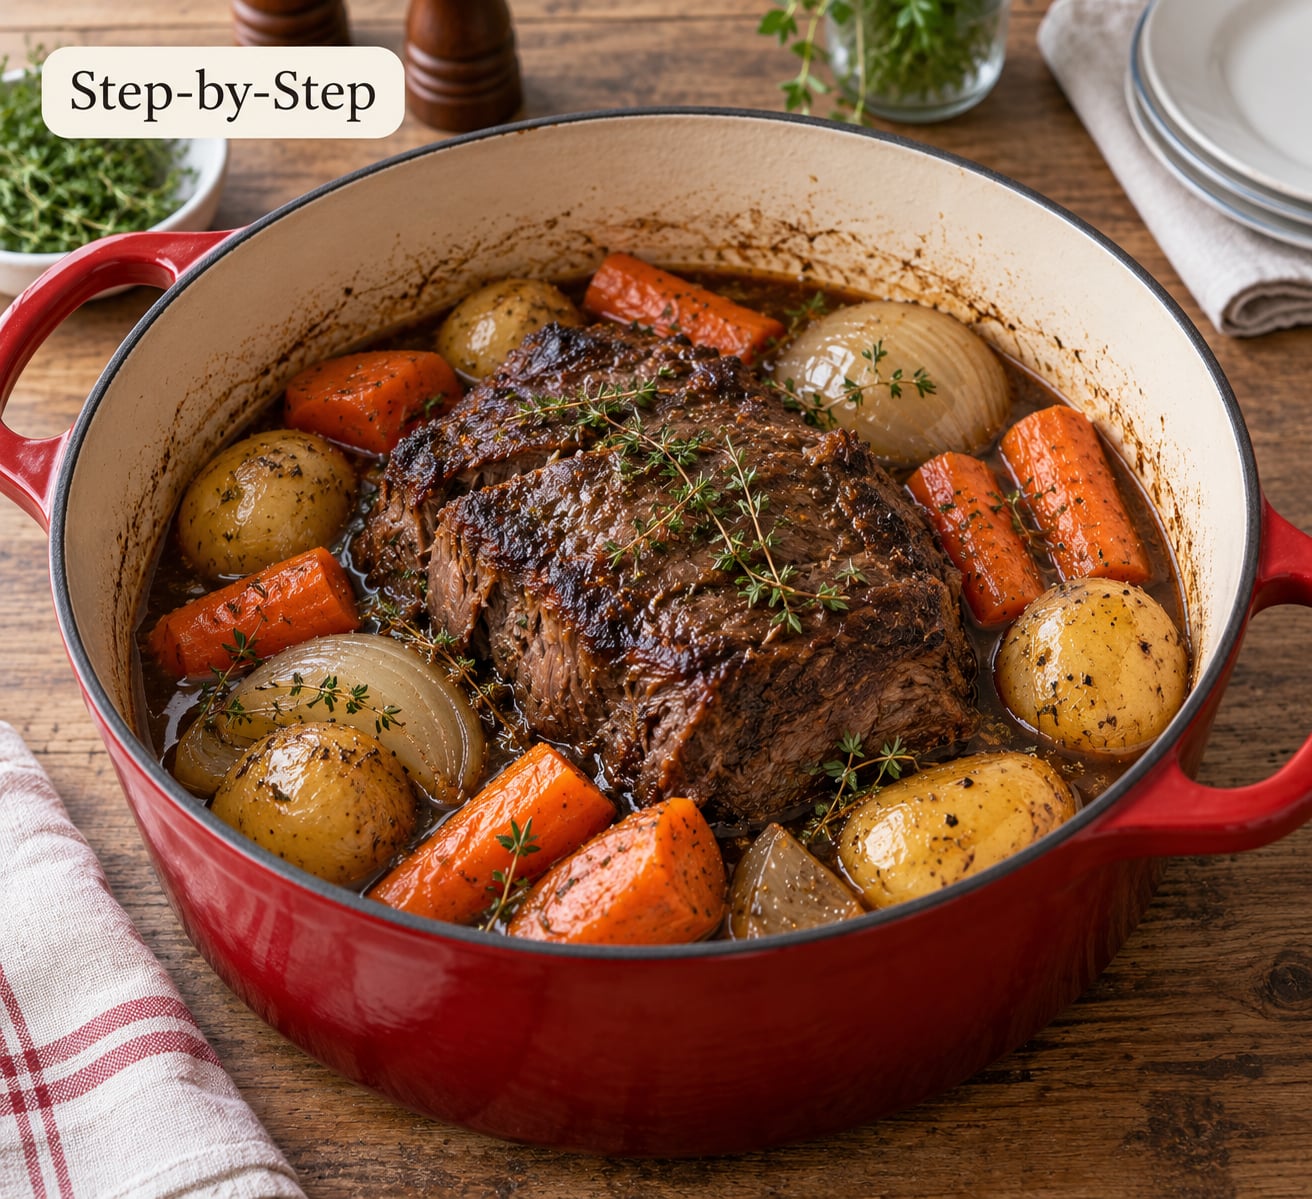
How to make pot roast in a Dutch oven: Prepare the beef
Take the roast out of the refrigerator 30 to 45 minutes before cooking. Meat taken straight from the cold sears unevenly, because the outside firms up before the center warms. While it sits, heat your oven to 300°F.
Trim the roast. Leave a thin layer of fat, about a quarter inch, because fat is flavor, but cut away any thick caps that will turn to chewing gum in the braise. Pat the surface dry with paper towels until it feels dry to the touch. This is the step people skip and then wonder why their roast has no crust, since a wet surface steams instead of browning.
Season on every side with kosher salt and coarse black pepper. Be generous. Braising seasons the meat from the outside in, and seasoned fat rendered into the liquid is what makes the gravy taste like more than broth.
How to make pot roast in a Dutch oven: Brown the beef
Set the Dutch oven over medium-high heat with the oil in it. Give the oil about a minute to shimmer, then lay the roast in. Avoid moving it once it is down. Let it sit undisturbed for 3 to 4 minutes per side until a deep brown crust forms.
A good sear is mahogany brown and dry-looking, not black. If the crust turns dark grey or the bottom of the pot starts to smoke, pull the heat down and wipe the burnt flecks out with a paper towel, because burnt fond makes the whole braise bitter.
If your cut is thick and uneven, give each flat face its own turn. Most home cooks get a good crust on two or three faces instead of every side, and that is enough.
How to make pot roast in a Dutch oven: Add vegetables and liquid
Pull the pot off the heat and lift the roast out onto a plate. Lower the heat to medium. Add the onion and a tablespoon of the oil, and cook for 4 to 5 minutes until the edges soften and take on color. Add the garlic and cook one minute more, just until fragrant.
Stir in the tomato paste and cook it for about a minute, until it darkens from bright red to brick. Scrape up every browned bit from the bottom of the pot, which is deglazing, and those bits are the foundation of the gravy. Pour in the broth and wine, scraping as you go, then stir in the Worcestershire sauce, bay leaves and thyme.
Return the roast to the pot, tucking it in so the liquid reaches about a third of the way up its side. Put the pot on the burner for 2 to 3 minutes to bring the liquid back to a simmer, then cover and move the whole pot into the 300°F oven.
Hold off on the potatoes and carrots for now. Added at the start, they spend three hours in liquid and turn to paste.
How to make pot roast in a Dutch oven: Braise until tender
This is the part where a timer lies to you. Cook time depends on the size of the roast, the oven, and how tight your pot is, so treat the times below as checkpoints and test for tenderness instead.
- 2 to 3 lb roast: 2.5 to 3 hours at 300°F, or 3 to 3.5 hours at 275°F
- 3 to 4 lb roast: 3 to 3.5 hours at 300°F, or 3.5 to 4 hours at 275°F
- 5 to 6 lb roast: 3.5 to 4 hours at 300°F, or 4 to 4.5 hours at 275°F
Rushing at 325°F saves 30 minutes and costs you moisture, which is why many careful cooks drop to 275°F and let it go longer. Higher heat tightens muscle proteins before collagen has time to melt, and that is exactly how you get tough meat.
At the two-hour mark, open the lid and turn the roast with tongs, then push the potatoes and carrots into the liquid around the meat. They need 45 to 60 minutes to cook through without disintegrating. Spoon a little liquid over the top of the roast and put the lid back on.
How to know it is done: slide an instant-read probe into the thickest part and you are looking for 195 to 205°F with almost no resistance. A bare hand test works too, if you push a fork into the meat and it slides in and out with no argument while the fibers give way. Sliceable is not done. Shreddable, with the muscle fibers separating under light pressure, is done.
For food safety, the USDA sets 145°F as the minimum internal temperature for whole cuts of beef, and this roast passes that long before it reaches tenderness. Because it cooks for hours in a covered pot, the real risks here are cooling and storage, not undercooking.
How to make pot roast in a Dutch oven: Rest and serve
Let the roast rest in the covered pot for 10 to 15 minutes after it comes out of the oven. Skipping the rest means the juices run out onto the cutting board the moment you cut, which is how you end up with dry slices and a dry plate.
Remove the roast and rest it on a board. Spoon off the fat that floats on top of the liquid, then set the pot over medium heat. Whisk the cornstarch and cold water slurry again, pour it in while stirring, and let it bubble for 2 to 3 minutes until it turns glossy and coats the back of a spoon. Add salt and a splash of hot water if it goes past thick.
Use cold water, not warm. Warm liquid turns to glue the instant it hits the cornstarch and gives you exactly the gluey gravy people complain about.
Slice against the grain or pull it apart with two forks, spoon the gravy over the top, and scatter the parsley. Serve it with the pan juices and something sharp to cut the fat, like a sharp dressed salad or pickled onions.
Common Mistakes and How to Fix Them
- Wrong cut. A lean round roast will not turn tender in a long braise. Use chuck, or cut a bottom round roast down for pot pie instead.
- Damp surface, no crust. Pat the roast dry before seasoning. Wet meat steams, and you cannot brown a wet surface.
- Searing too hot. If the oil shimmers hard and the fond goes black immediately, turn the heat down to medium-high. Bitter fond flavors the whole pot.
- Oven too hot. Anything at 350°F or above dries the outside while the center is still tight. Drop to 300°F, or 275°F if you have the time.
- Too much liquid. The roast should sit in liquid no more than a third of the way up. Excess liquid makes a stew, and a stew has no concentrated sauce at the end.
- A pot that is too small. Crowd the meat and it steams instead of searing, and there is no room for vegetables. Move up a size.
- Vegetables from the start. Potatoes added at hour one are mush by the end. Add them for the last 45 to 60 minutes, and cut them in 2-inch chunks so they hold together.
- Slicing straight from the pot. Rest the roast 10 to 15 minutes under loosely tented foil so the juices redistribute.
- Thickening with a warm slurry. Mix cornstarch with cold water and whisk it in cold. Then bring the heat up and stir.
- Trusting the timer alone. Test with a probe or a fork at the low end of the range. A roast that needs another 30 minutes costs you nothing; an overcooked one cannot be fixed.
One more worth naming, because it comes up constantly in home kitchens: cooking a chuck roast in a slow cooker does work, and it produces tender meat, but it will not produce a crust or a browned fond, so the gravy is thinner and less flavorful. Same cut, same liquid, different result.
Frequently Asked Questions
How long does pot roast take in a Dutch oven?
A 3-to-4-pound chuck roast needs about 3 to 3.5 hours at 300°F, or 3.5 to 4 hours at 275°F, braised covered. A 5-to-6-pound roast adds roughly an hour. Judge by tenderness rather than the clock, since ovens and pots vary: the meat is ready when a probe slides through at 195 to 205°F with almost no resistance, or a fork passes through and the fibers give way. Sliceable is not finished.
What temperature should I cook pot roast at in a Dutch oven?
Use 300°F for the best balance of speed and tenderness, which is the temperature most tested Dutch oven pot roast recipes use. Dropping to 275°F gives slightly moister meat and costs about 30 to 45 minutes. Avoid 350°F and above, which tightens the muscle proteins before the collagen converts and is the usual reason a pot roast turns out tough and dry.
What cut of beef is best for Dutch oven pot roast?
Beef chuck roast is the best cut because it carries the connective tissue that melts into gelatin during a covered braise. Buy it boneless for ease and trim the thick fat caps yourself. Bottom round and eye round are leaner and will stay tough over a long cook, so use them only for a shorter braise and slice them against the grain.
How do I know when pot roast is done?
Push a fork into the thickest part. If it slides in and out easily and the muscle fibers separate under light pressure, the roast is done. An instant-read probe is more precise: look for 195 to 205°F with almost no resistance. If the probe meets strong resistance and the meat is springy, give it another 30 to 45 minutes and test again.
Do I have to brown the beef before making pot roast?
You do not have to, but you should. Browning the dry surface builds the crust that carries the dish and leaves browned bits on the pot floor, and those bits become the base of the gravy once you deglaze. A skipped sear still yields tender meat, just with a thinner sauce and no crust, which is the trade most people do not want to make.
Can I make Dutch oven pot roast ahead of time?
Yes, and it often tastes better the next day. Cool the roast and juices in shallow containers, refrigerate for up to three or four days, and reheat gently in a covered pan with a splash of broth so the meat does not dry out. It also freezes well for three months, ideally as a whole roast with the juices kept separate from the vegetables.
Conclusion
Start by patting the chuck roast dry and giving it a real sear, 3 to 4 minutes a side until the crust is deep brown. That single step decides whether you get a roast worth talking about or just a piece of boiled beef.
After that it is mostly waiting. Cover the pot, keep the oven at 300°F, add the potatoes and carrots for the last hour, and test for tenderness rather than trusting a timer. Rest the roast before you cut it, thicken the drippings with a slurry made from cold water, and serve it with something sharp on the side.