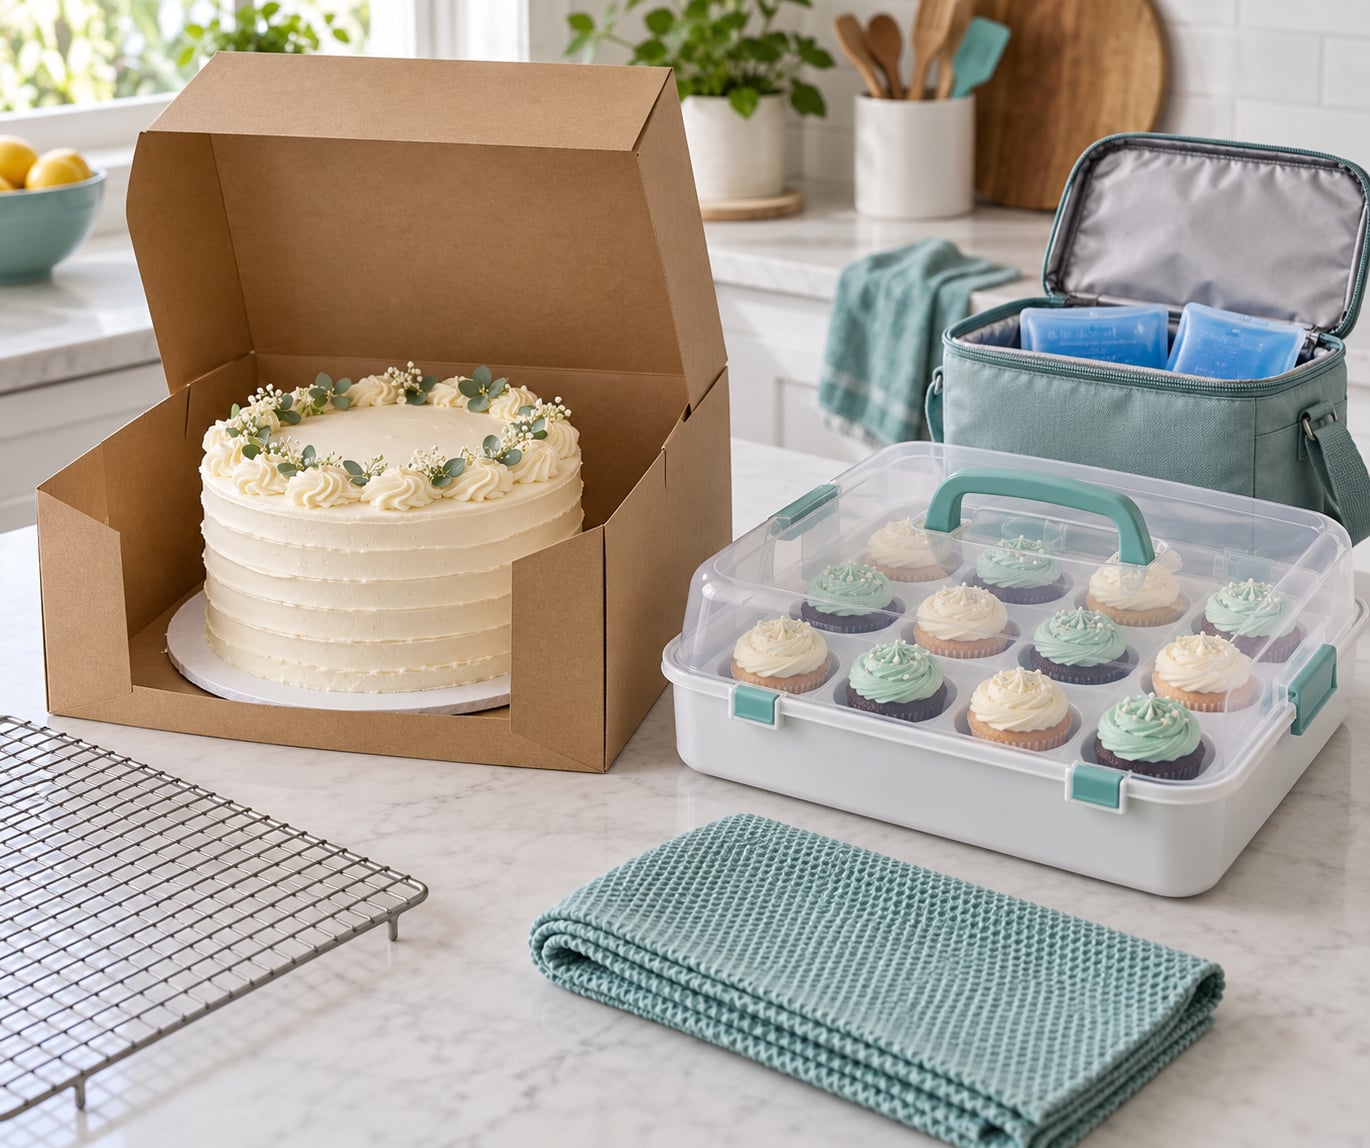
Learning how to transport cake and cupcakes without damage comes down to four things: cold frosting, a snug box, a flat surface in the vehicle, and unhurried driving. Chill the finished dessert for 20 to 30 minutes, seat it on a board in a box with almost no room to move, wedge that box on the passenger-side floor over a non-slip mat, and take the corners slowly. A simple iced layer cake takes about five minutes to pack. A three-tier wedding cake takes an evening.
I learned this the expensive way, carrying a sheet cake balanced on a passenger seat and watching a corner slide off at the first stop sign. The frosting was fine. The cake itself had cracked through the middle, and the whole thing had to be re-iced an hour before the party. Nobody in the room said anything, which was worse.
So here is the method that has not let me down since: cool the cake completely, chill it, box it snug, park it flat, drive like the box is full of eggs. The rest of this guide covers the gear, the five steps, and the handful of mistakes that account for nearly every ruined dessert I have seen.
Table of Contents
- What You Need
- Containers that fit the dessert
- Boards, inserts and liners
- Temperature control
- Step-by-Step: How to Transport Cake and Cupcakes Without Damage
- Step 1: Chill the Cake and Cupcakes Completely
- Step 2: Choose a Container That Fits the Dessert
- Step 3: Secure the Cake or Cupcake Box on a Flat Surface
- Step 4: Protect the Vehicle and Keep the Temperature Stable
- How long different frostings survive in a warm car
- Step 5: Drive Smoothly and Unload Carefully
- Common Mistakes
- Packing the cake while it is still warm
- Using a box that is far too large
- Leaving the cake on a car seat
- Trusting a flimsy box with a big batch
- Leaving the lid too low for tall decorations
- Opening the box in the rain or in a hurry
- Forgetting the container for a no-box trip
- Transporting cupcakes with no carrier at all
- How early you can bake ahead
- Frequently Asked Questions
- How far in advance should I chill a cake before transporting it?
- Can I transport a cake and cupcakes in the same box?
- Should I use ice packs when carrying a cake?
- How do I transport a tall cake without it tipping?
- What is the safest way to transport cupcakes in a car?
- Can I transport a cake that has already been decorated?
- Start With the Fridge and the Floor
What You Need
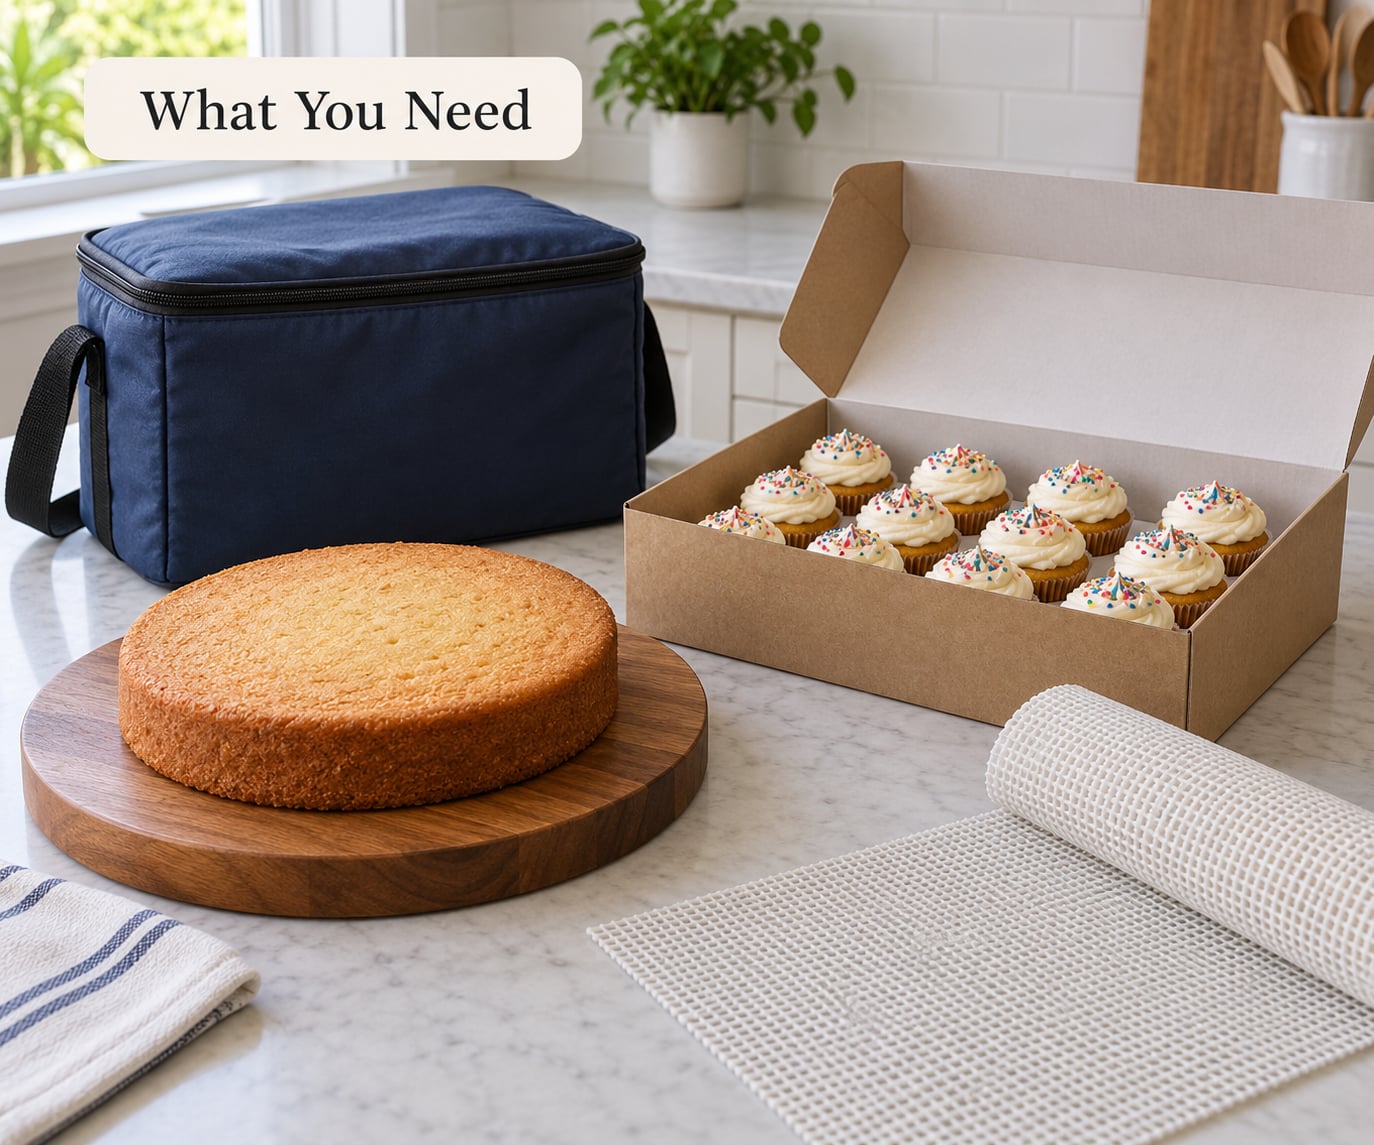
None of this is specialized gear. Every item below is either a baking supply you already own or something a grocery store sells in the baking aisle.
Containers that fit the dessert
A rigid cake box in the size of the cake is the single most useful thing here. Round cakes need a box with a snug circular footprint, not a square box so large that the cake rattles around in it. Sheet cakes need a flat box wide enough to take the whole pan footprint. For cupcakes, a multi-cupcake box with a molded insert or wells is worth far more than a stack of flimsy individual boxes, because the insert keeps every cupcake in the same position while the car moves.
For a tall or tiered cake, a rigid drum or heavy board under the cake matters more than the box. The board is what gets lifted, and a cake sitting directly on cardboard will bow and crack before the lid even goes on.
Boards, inserts and liners
Cake boards or drums sized slightly larger than the cake, a cupcake insert or set of dividers, parchment or wax paper cut to fit the board, and a roll of non-slip shelf liner. The liner is the unsung hero: a folded strip of it, or a damp towel squeezed dry, gives the box a grippy base so it stays put on the car floor instead of creeping forward with every brake.
Plastic cups, small jars with lids, or a muffin tin also work as improvised cupcake wells when a real carrier is not around. The baking-parchment trick is useful too, since it stops a chilled cake sticking to the box floor when you finally open the lid.
Temperature control
Chilled gel packs, a small insulated cooler, and a regular refrigerator. Gel packs go in an insulated bag, not pressed straight against the frosting, because a pack touching a cold cake leaves condensation on the box walls and a wet cake never looks good again. If the drive is twenty minutes in mild weather, the fridge alone is enough and the cooler is overkill.
Keep the vehicle itself prepared too: a shaded parking spot at the destination, air conditioning running cool rather than cold, and a clear boot or footwell so the box is not wedged between bags and a spare tire.
Step-by-Step: How to Transport Cake and Cupcakes Without Damage
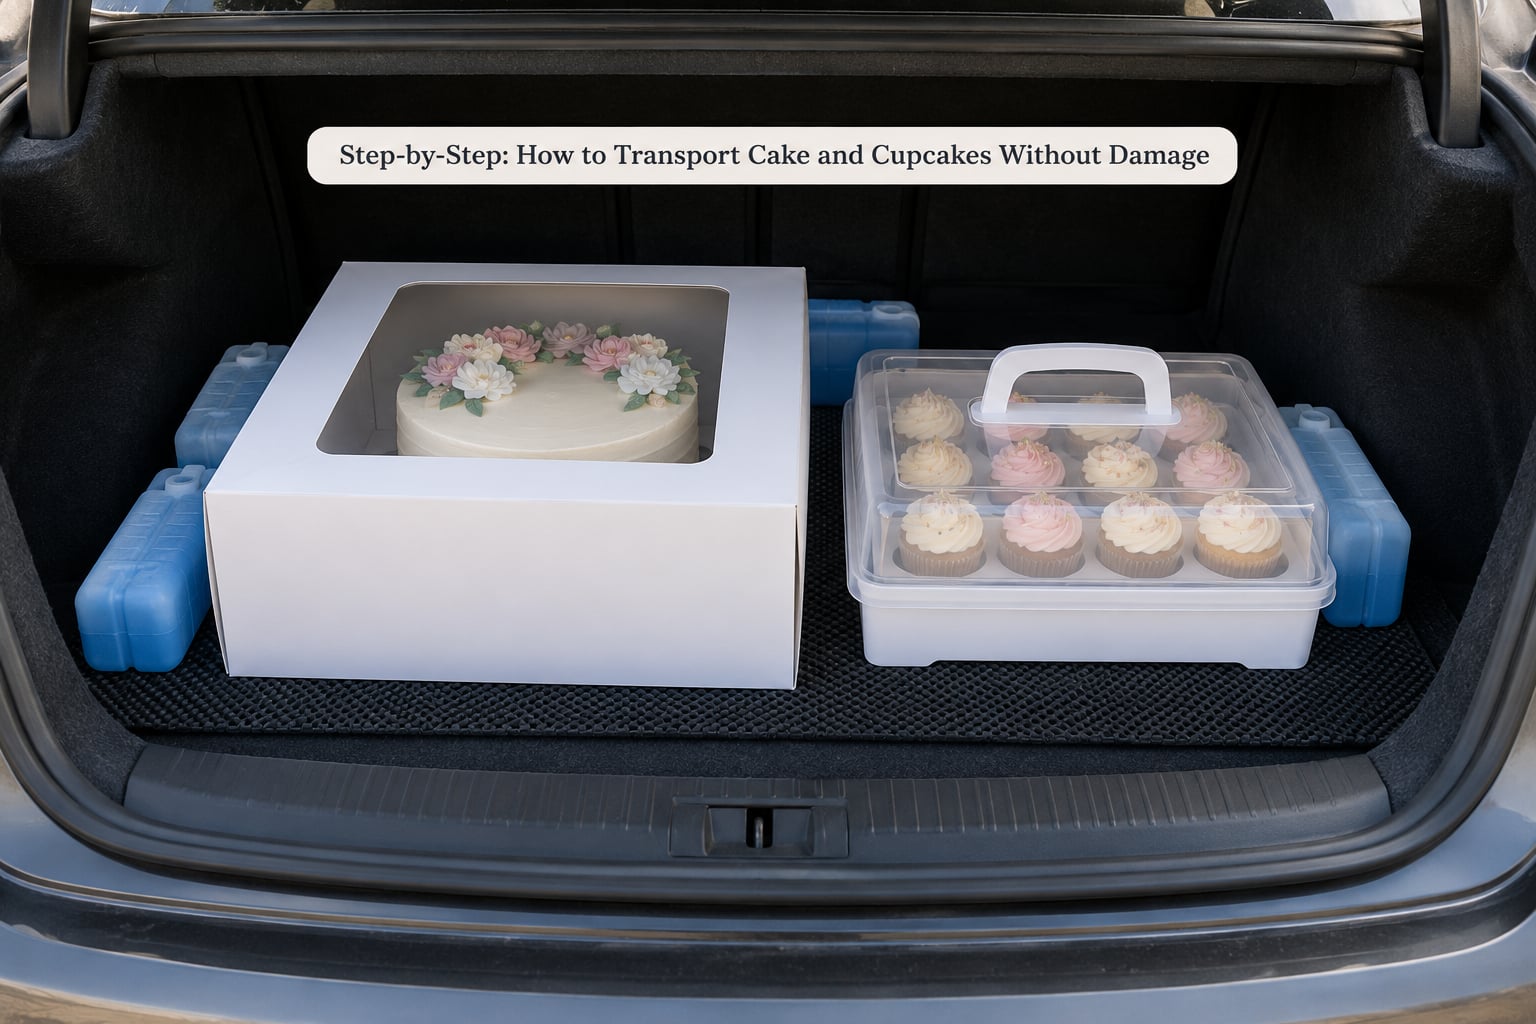
Step 1: Chill the Cake and Cupcakes Completely
Cooling and chilling are two different jobs, and skipping either one causes most of the damage. A cake straight from the oven is warm right through the middle, and a warm cake is soft, so any pressure at all dents the crumb and the frosting slumps. Give a layer cake 45 to 60 minutes on a wire rack in a cool kitchen before it goes near a box, until the base no longer feels warm at all. Cupcakes cool faster, around 30 minutes, and the wire rack matters because a cupcake parked on a plate traps steam under the frosting.
Then chill. Buttercream, whipped ganache, cream cheese frosting and any butter-based filling firm up nicely after 20 to 30 minutes in the refrigerator, and chilled frosting is the single biggest reason a cake arrives looking like the one you decorated. Fondant barely needs chilling, though a cool cake is still easier to handle. Fillings matter more than anyone expects: a cake filled with curd, jam, or custard should stay refrigerated until the last possible moment, because a warm interior is where odd smells and sogginess start.
Firm frosting also resists smearing when you slide the cake onto the board and slide the board into the box. Even fingertips dragging across a chilled surface leave a mark you cannot undo.
Step 2: Choose a Container That Fits the Dessert
Pick the box so the cake fills most of the footprint and has an inch or two of clearance above the frosting or decorations. A box far too big lets the cake slide several centimetres on the first turn, and a box far too tight crushes tall decorations as the lid goes down.
For cupcakes, a box with an insert keeps all twelve or twenty-four in fixed wells, so one leaning over does not drag its neighbours down. If your cupcakes are tall-swirled or topped with fruit, check the lid height before packing. A cheap fix that people in baking forums swear by is taping a second box on top of the first, without the base, purely to gain lid height, then taping the seam. When the lid is domed or the box has no insert at all, individual domed plastic covers over each cupcake cost very little and turn a disaster into a non-event.
For a tall or tiered cake, skip the beginner method and assemble it at the venue. Baking the tiers separately and stacking on site is what professional decorators do, because a stacked three-tier cake is a top-heavy object that no box and no road will save. If you must move a stacked cake, it goes on a heavy drum with wooden dowels through the lower tiers, a box tall enough to clear the top tier, and the shortest possible drive. That is a two-person job with one person driving.
Step 3: Secure the Cake or Cupcake Box on a Flat Surface
Everything above this step is wasted if the box rides on a tilted surface, because the car floor is flat and the seat is not. The passenger-side footwell is the most stable spot in most cars: low, flat, and out of the way of the driver’s knees. The boot works too, but only if it is level, and boots are often where the spare tire and a bag of shopping decide to live.
Put down a non-slip shelf liner or a folded towel before the box goes down. Turn the box so its lowest point is toward the front axle if the surface tilts slightly, and pack soft items, folded towels, around the sides so nothing can tip. If you have two desserts, place them separately rather than balancing one on the other. A flat rolling cart, the kind used in restaurant kitchens, makes the trip from the vehicle to the table painless for anything heavy.
Before you set the cake on the board, put a square of parchment on the board and let the cake rest on that. The layer will not weld itself to the cardboard when the box is opened, and lifting it is cleaner.
Step 4: Protect the Vehicle and Keep the Temperature Stable
Heat is the quiet killer. A parked car in summer climbs past 40°C fast, and buttercream softens, whipped cream frosting slumps, fondant decorations soften, and a cake that felt firm in the kitchen turns tacky in the boot. Keep the air conditioning on cool, not cold, since an overly chilled cabin produces its own problems: condensation forms on the box walls and on the cake surface, and a sugar surface that goes wet goes grainy and dull.
For a drive under an hour in mild weather, skip the cold packs entirely. For a long drive or a hot day, wrap two or three gel packs in a towel, keep them beside the box rather than touching the cake, and put the whole thing in an insulated cooler or bag with a tight-fitting lid. Chilled cake plus warm humid air equals condensation, so if the cake has been in the fridge, the box should be sealed before it goes anywhere near the car.
The same logic rules out an unexpected rain shower, which is exactly when people are tempted to throw a towel over an open box. Keep the lid closed, carry the box under cover, and open it only once you are indoors on a flat surface. If the journey is longer than three hours, either keep the dessert properly cold the whole way or accept that anything with cream in it is on borrowed time.
How long different frostings survive in a warm car
Frosting type decides your time limit far more than distance does. A buttercream cake held together by a firm crumb and a buttercream shell is the most forgiving, staying presentable in a cool car for a couple of hours. Whipped cream and whipped ganache frosting lose their shape quickly once the car warms up, so a cake frosted with them wants the air conditioning and a short journey. Cream cheese frosting sits in the middle: stable for a moderate drive, not something I would leave in a hot vehicle. Fondant holds its shape better than anything, but sugar decorations soften and slump once the interior temperature climbs, and a shiny fondant surface picks up every fingerprint and dust mote. For a trip over two hours in warm weather, the choice that causes fewest worries is a cake frosted with a stable buttercream or ganache, kept cool the entire way, rather than one with fresh cream.
Step 5: Drive Smoothly and Unload Carefully
The box will be a couple of kilograms and full of soft material, which means it is the most fragile thing you own. Accelerate gently, take turns slowly, and give stopping distance more than you think you need because the hard brake is what sends a cake sliding into a lid. Rough roads and speed bumps deserve the same care; some people route around a badly surfaced street entirely when a cake is on board.
Park in the shade and park close to the door. Carry the box flat with two hands underneath, never by the edges, and never on your hip. If the car has to be left running and watched, do not leave the dessert in a hot vehicle while you carry other things inside; someone trustworthy should stay with it or it goes straight into the cooler.
On arrival, put the box on a flat counter and let the cake sit for 10 to 15 minutes before lifting the lid. That rest lets any movement settle, and opening the box immediately often ends with a small collapse in the center. When you do lift, run a thin knife around the edge first so the cake releases without being levered upward.
Common Mistakes
Almost every damaged cake traces back to one of the following, and each has a straightforward fix.
Packing the cake while it is still warm
Warm cake is soft cake, and a soft cake dents, cracks and sticks to everything it touches. Fix: cool it fully on a wire rack, 45 to 60 minutes for a layer and about 30 for cupcakes, then chill 20 to 30 minutes before it goes into a box. If you cannot chill, at least cool it completely and pack it in the least crowded box you own.
Using a box that is far too large
Extra space means sliding room, and a cake that moves two centimetres can shear its layers and crack from the bottom. Fix: pick a box where the cake fills most of the base, and wedge the empty space with tissue or rolled towels. Large square boxes on sale for a single round cake are the worst offenders.
Leaving the cake on a car seat
Seats are soft and angled, so a cake on one travels downhill on every turn, and the seat belt cannot save it. Fix: the flat footwell, ideally the passenger side, over a non-slip liner or folded towel. If a footwell is not an option, use the level boot floor or a flat parcel shelf, never a lap or a cushion.
Trusting a flimsy box with a big batch
Bakers report single-layer cardboard cupcake boxes bowing and giving way under the weight of a full batch, which turns twelve perfect cupcakes into twelve smudged ones. Fix: use a rigid carrier with an insert, or split a large batch across several small boxes, each of which stays under about a dozen cupcakes.
Leaving the lid too low for tall decorations
Swirled buttercream peaks and fresh fruit sit higher than most lids expect, so the lid goes on at an angle and the design gets flattened. Fix: measure the tallest decoration with a ruler before you choose a box, and tape an extra box section on top for extra height when the design needs it.
Opening the box in the rain or in a hurry
Water beads on a frosting surface, and rushing means lifting the cake out before the frosting has settled. Fix: keep the lid shut until you are indoors at a flat counter, then wait 10 to 15 minutes before opening.
Forgetting the container for a no-box trip
Wrapping a cake in cling film and hoping for the best is the same as leaving the lid off. Fix: the standard substitutes are a flat-bottomed roasting pan or a muffin tin nested inside a sturdy box, or a cake pan itself with a board and domed lid fitted on top. They are not pretty, and they work.
Transporting cupcakes with no carrier at all
If there is no box in the house, five household stand-ins have been keeping cupcakes intact for years. A muffin tin nested inside any sturdy cardboard box gives you individual wells in seconds. A dozen clear plastic cups or small lidded jars hold the frosting out of harm’s way and can be packed tight so nothing shifts. The cake pan itself, covered with a board and a domed lid fitted over the top, works for a single cake if you secure the board to the pan so the two move as one piece. Cling film wrapped over the whole tray, with a flat board pressed gently on top, is the last resort, and it is far better than nothing. A rolled towel inside a bag of ice with a cake on a board is the classic wedding-cake-in-a-cooler method. Whichever substitute you use, the rule from step 2 does not change: each item needs its own well and no room to slide.
How early you can bake ahead
Transport is easier when the dessert is not freshly baked. An undecorated buttercream or oil cake keeps at room temperature for a day or two in a cool kitchen, wrapped, and up to about five days in the refrigerator. Cupcakes are the same: two days ahead is comfortable, three is fine, and freezing them unfrosted a week early is better still. Frosted cupcakes last about a day at room temperature and three to four days refrigerated, since the frosting picks up smells from the fridge. Frost a day-old cake rather than a same-day one if the frosting needs to sit well, and add any fresh fruit, flowers or meringue on the day of the event. If you need to move a cake, make it a day early, frost it the day before, and chill it on the morning of the trip.
A couple of smaller habits help as well. Label the box before it leaves the house so you can find the lid, and keep the cold packs beside the cake rather than on top of it. When a cake is going more than a few miles, take the route with the smoothest surface you know.
Frequently Asked Questions
How far in advance should I chill a cake before transporting it?
Chill a fully cooled cake for 20 to 30 minutes before it goes into the box. That is long enough for buttercream, whipped ganache and cream cheese frosting to firm up without making the crumb go cold and crumbly. For a three-hour drive or a hot day, chill longer, up to an hour, and carry gel packs in an insulated bag beside the box rather than touching the cake. Fillings made with curd, jam or custard want the cake kept refrigerated until the moment you load the car.
Can I transport a cake and cupcakes in the same box?
Only in a large enough container that each item has its own well and neither touches the other. Stacking a cake on top of a cupcake box is a bad idea because the weight of the cake crushes the frosting underneath, and sliding cupcakes knock the cake sideways. Two separate boxes on the flat vehicle floor, separated by a folded towel, is far safer. If space is tight, transport the cupcakes in a rigid carrier with an insert and put the cake in its own snug box beside it.
Should I use ice packs when carrying a cake?
For a short drive in mild weather, no. Gel packs are only worth the trouble for a long journey or a hot day, and even then they belong in an insulated bag beside the box, not pressed against the frosting. A cold pack touching a chilled cake creates condensation on the box walls, which makes the frosting wet, dull and sticky. Wrap packs in a towel, keep the cooler closed until you arrive, and let the cake sit for 10 to 15 minutes before opening.
How do I transport a tall cake without it tipping?
Build it the way decorators do: a heavy cake drum or board under the bottom tier, wooden dowels through the lower tiers so the weight above sits on the dowels rather than on the cake, and a box tall enough that the lid clears the top tier. Drive with it on the passenger-side floor and take corners at walking pace. For a wedding cake with three tiers or more, the safer choice is to bake and stack the tiers separately and assemble on site. A tall stacked cake is the hardest dessert to move safely.
What is the safest way to transport cupcakes in a car?
Cool them fully on a wire rack, chill the frosted tops for 20 to 30 minutes, then pack them in a rigid box with a molded insert so each cupcake sits in its own well. On arrival, let the box rest before opening. Cupcakes travel better than a single large tiered cake because the insert spreads movement across the whole box, so a single cupcake that leans cannot drag its neighbours over. Keep the box on the flat footwell over a non-slip liner, and never carry a full batch in a single-layer cardboard box.
Can I transport a cake that has already been decorated?
Yes, as long as it is decorated in a way that survives contact with a lid. Buttercream, ganache, fondant and simple piped borders all travel well once chilled, and 20 to 30 minutes in the refrigerator firms them up first. Fresh cream, meringue peaks and soft sugar decorations are the fragile ones, so measure the height and check the lid fits before you start, and consider moving the most delicate toppers on separately. Fresh flowers and heavy toppers are best added at the venue.
Start With the Fridge and the Floor
If you only remember two things, make them these. Give the dessert 20 to 30 minutes in the refrigerator so the frosting firms up, and put the box on the flat passenger-side floor over a non-slip liner rather than on a sloped seat. Add a snug box, gentle corners, and a 10-minute rest before you open the lid, and a cake finished in the kitchen will look the same when you cut it at the venue.