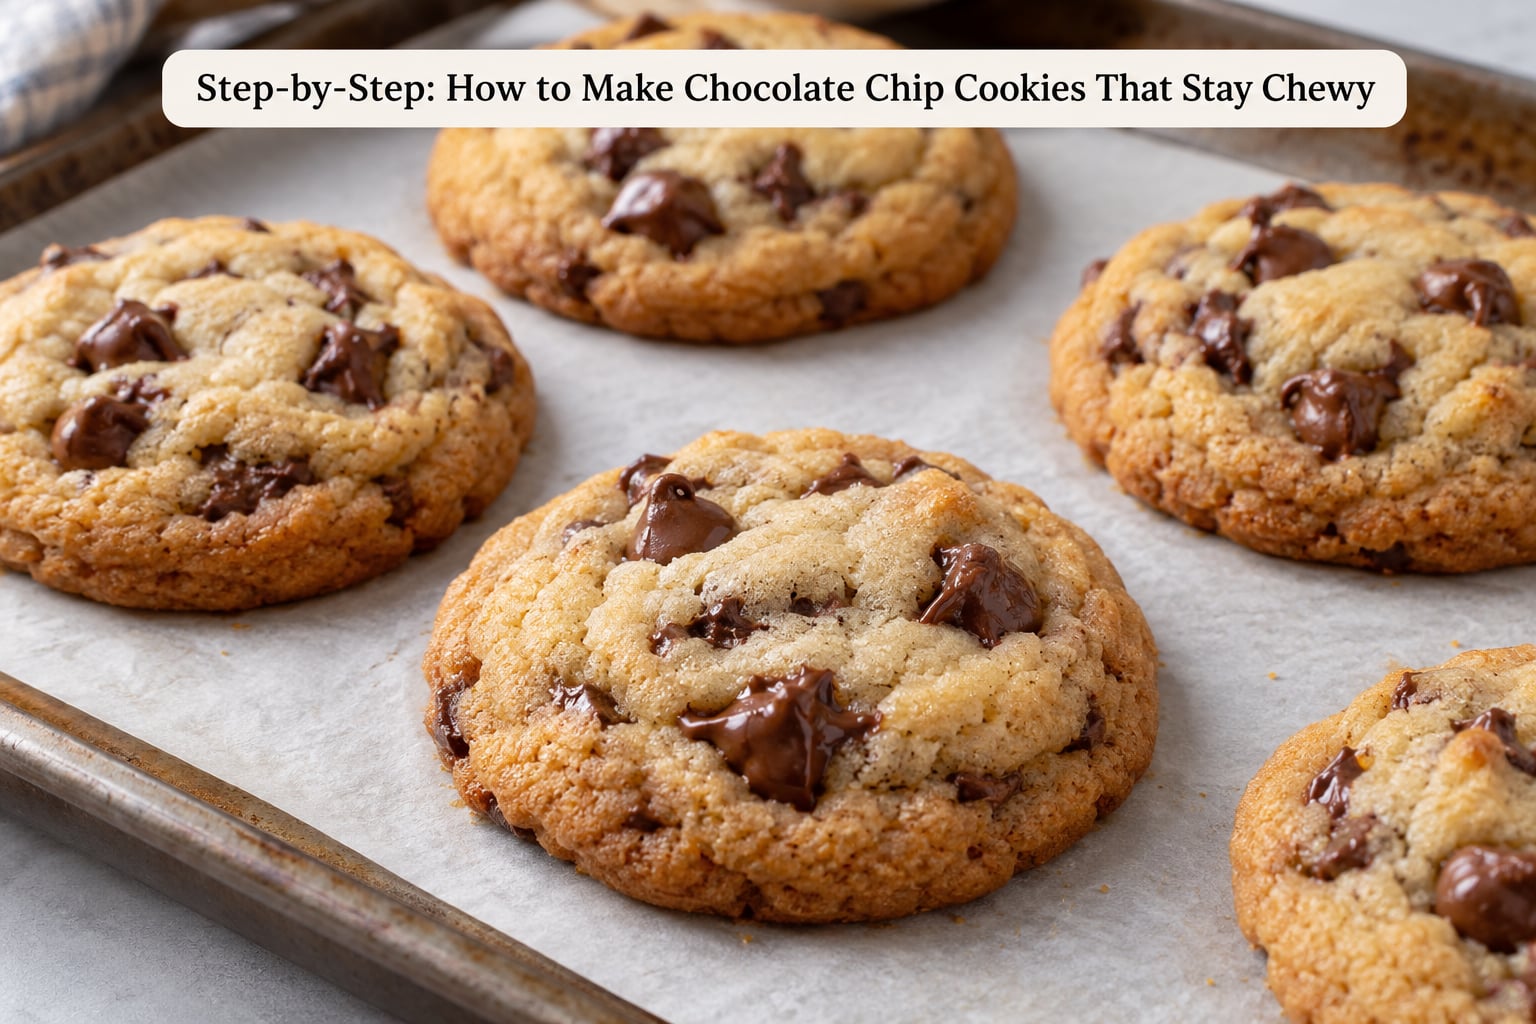
The secret to how to make chocolate chip cookies that stay chewy is not one magic ingredient. It is three levers working together: a high brown sugar to white sugar ratio with an extra egg yolk to trap moisture, a dough firm enough not to spread into a thin wafer, and a short bake so the center is still soft when the timer goes off. Get those right and the cookies stay chewy for days, not hours.
Below is the method I use for a batch of about 18 bakery-style cookies, with the visual cues for each step. Most ovens run hot, so treat the times as a guide and the color as the signal.
Table of Contents
- What You Need
- Step-by-Step: How to Make Chocolate Chip Cookies That Stay Chewy
- Mix the Dry Ingredients and Chop the Chocolate
- Brown the Butter and Make the Dough
- Chill the Dough and Portion the Cookies
- Bake Until the Edges Are Set
- Cool the Cookies for the Right Texture
- Common Mistakes
- Frequently Asked Questions
- Why are my chocolate chip cookies hard after baking?
- Can I use melted butter instead of softened butter?
- How long should chocolate chip cookie dough chill before baking?
- Can I make chocolate chip cookies from scratch without baking soda?
- How do I know when chewy chocolate chip cookies are done?
- Can I freeze chocolate chip cookie dough?
What You Need
The whole method runs on about 15 minutes of active work plus a chill. Here is the formula I start from, with weights because cups are where most cookie recipes quietly go wrong.
- 140 grams (1 cup plus 2 tablespoons) all-purpose flour, or 70 grams all-purpose plus 70 grams bread flour. Bread flour carries more protein, which builds structure so the dough holds its shape instead of spreading thin.
- 150 grams (3/4 cup plus 2 tablespoons) packed dark brown sugar plus 50 grams (1/4 cup) granulated sugar. That is a 3:1 brown-to-white ratio. Dark brown sugar carries the most molasses, and molasses holds water.
- 115 grams (1/2 cup) unsalted butter, melted and cooled to just warm. Salted works fine; just leave the salt out of the dough.
- One whole egg plus one extra yolk. The extra yolk brings fat and protein that slow gluten development and give the center a dense, fudgy pull.
- 1 teaspoon baking soda, 1 teaspoon vanilla extract, 1/2 teaspoon fine sea salt.
- 170 grams (1 cup plus 2 tablespoons) chocolate, chopped from a bar or use semi-sweet chips. Chopped chocolate makes irregular pockets; chips melt into even dots.
- 1 tablespoon cornstarch. A small amount of starch holds moisture in the center and softens the crumb. It is the least-used trick in cookie recipes and it works.
For equipment: a kitchen scale, a stand mixer or sturdy bowl and wooden spoon, a cookie scoop, heavy baking sheet lined with parchment, a wire cooling rack, and an airtight container for later. A spring-loaded scoop is worth having if you bake often. It gives you the same weight of dough every time, and uneven sizes are why a batch comes out half chewy and half flat.
Step-by-Step: How to Make Chocolate Chip Cookies That Stay Chewy
Mix the Dry Ingredients and Chop the Chocolate
Whisk the flour, baking soda, salt, and cornstarch together in a bowl. Spoon the flour in and level it with a knife rather than scooping and shaking, because a cup of shaken flour can carry 20 percent more dry flour than the recipe calls for, and extra flour is the single most common reason a cookie comes out cakey and dry.
Chop the chocolate on a cutting board in rough pieces, somewhere between a coarse crumb and a whole chip. Those uneven shards melt into pockets of different sizes, which is what gives a bakery cookie its texture rather than an even grid of chips. If you are short on time, chips are a fine substitute.
Brown the Butter and Make the Dough
Melt the butter in a light-colored pan over medium heat and keep it moving. It foams, then the milk solids at the bottom turn golden and smell like toffee, about 3 to 4 minutes in. Pour it into a bowl and let it cool to just warm, about 5 minutes. Adding sugar to butter hot enough to melt it will turn your dough to paste.
Add both sugars and beat hard for at least 3 full minutes. This is not optional ceremony. Sugar dissolves into the warm butter, and the emulsion it creates is what later holds air and moisture in the cookie rather than letting it drain out onto the sheet.
Beat in the whole egg, the extra yolk, and the vanilla until the mixture is uniform and glossy. Fold in the dry ingredients just until no flour streaks remain, then stir in the chocolate. Stop while it still looks slightly marbled. Once the gluten network has formed you are done mixing, and more stirring makes cookies tough.
Chill the Dough and Portion the Cookies
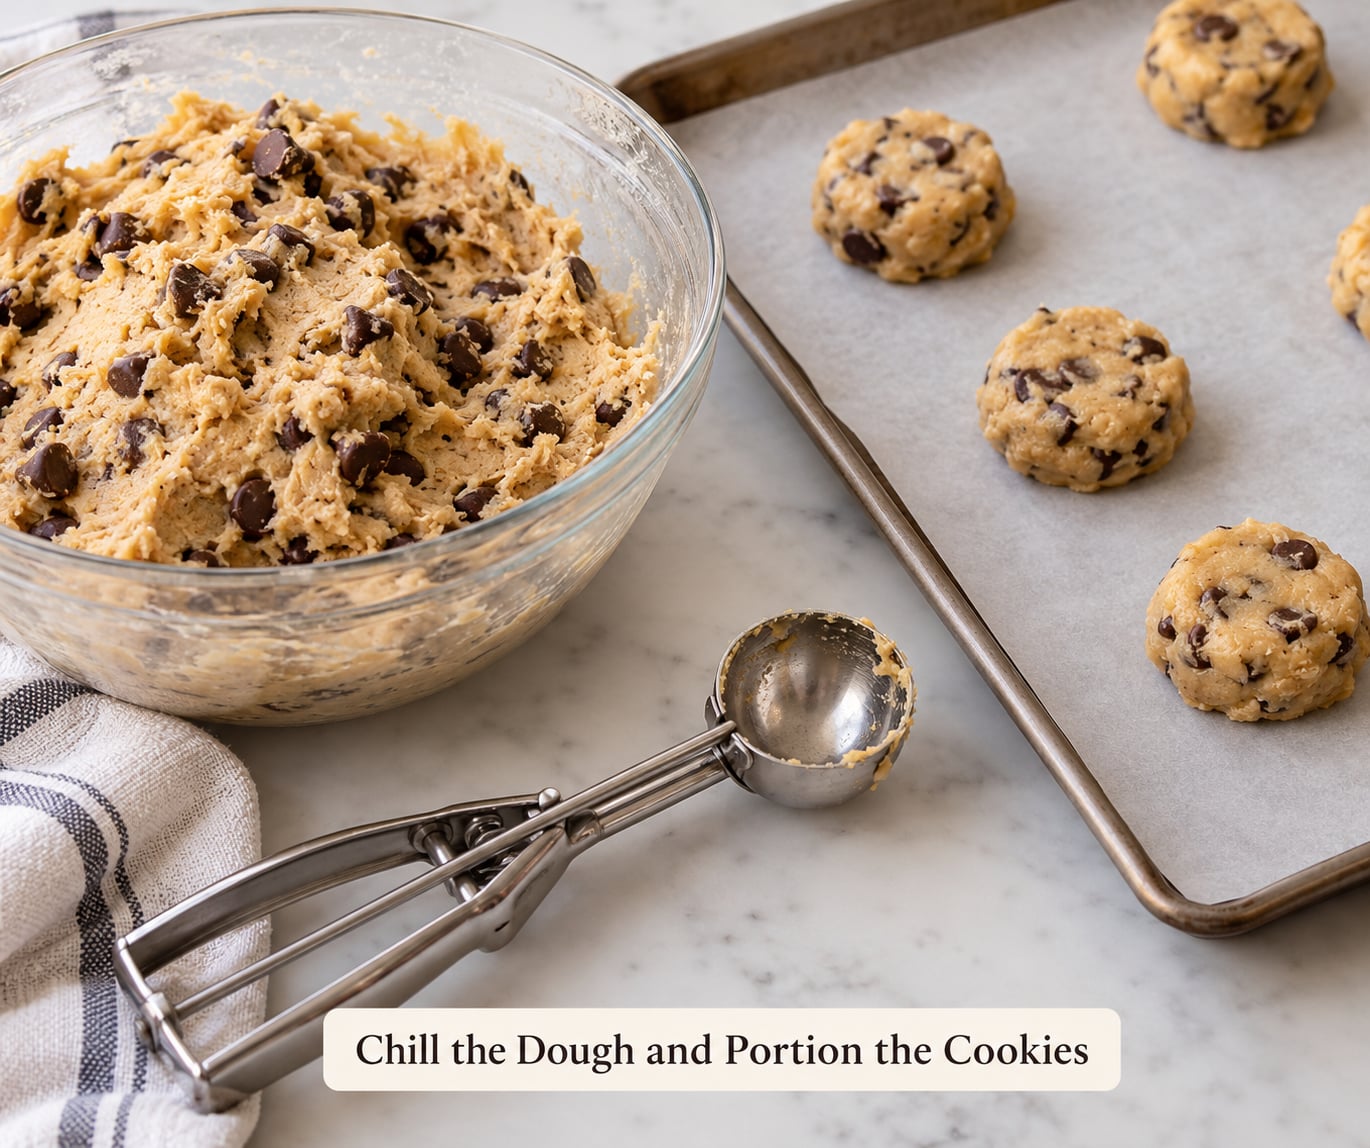
Cover and chill for at least 30 minutes, or up to 72 hours. Chilling firms the butter so the dough spreads less, which is the whole point: a taller cookie stays chewy because there is more interior left to chew. Thirty minutes gets you most of the benefit. The longer rest also deepens the flavor as the flour hydrates, which is why dough that has sat for two days bakes noticeably better.
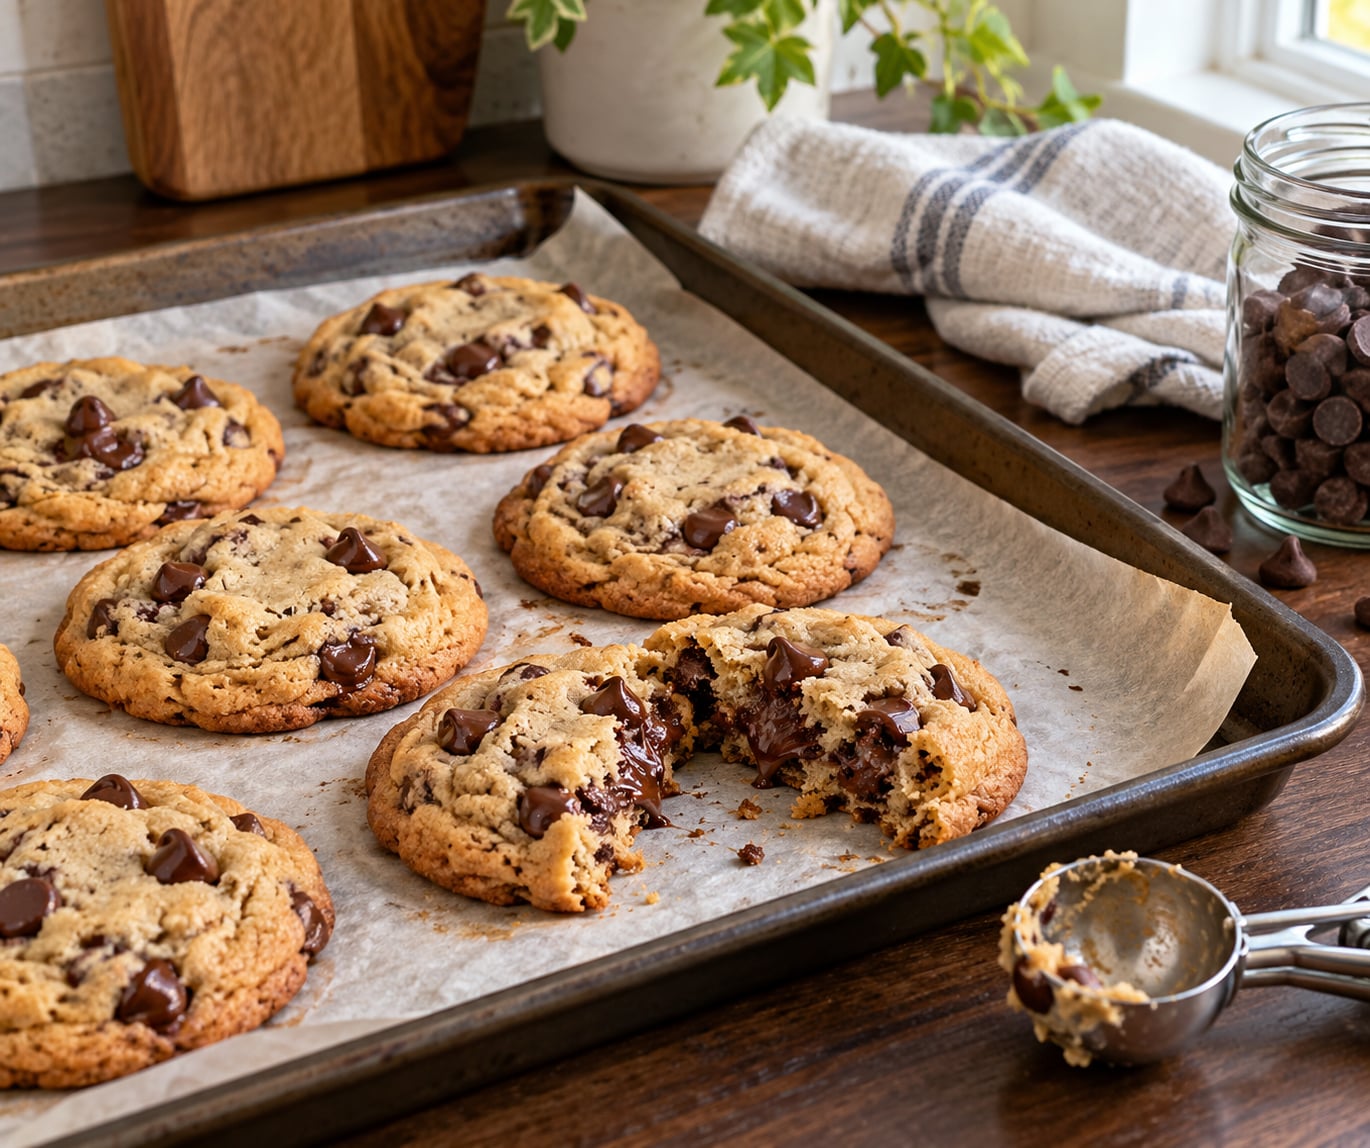
Scoop 60-gram portions and roll each one between your palms so the mound is taller than it is wide. That shape is the difference between a chewy cookie and a thin crisp one. Set them at least 2 inches apart on the lined sheet so they have room to spread without touching, and press any stray chocolate chunks back into the dough.
Heat the oven to 325F and give it a full 10 minutes at temperature. Cookies going into a just-warmed oven lose heat and bake unevenly.
Bake Until the Edges Are Set
Bake for 10 to 14 minutes, and start checking at 12. Oven temperatures vary by 25F or more between a calibrated thermometer and what the dial claims, so the timer is the least reliable part of the method.
Pull the tray when the edges are set and just turning golden and the centers still look pale, slightly domed, and matte. They should not look baked. The cookies keep cooking on the hot pan for the 2 to 3 minutes they sit there, and that carryover heat finishes setting the center while keeping it soft. Baking to the point where the sheet looks done is how you lose the chew and get a crackly shell instead.
Color is the honest signal here. Dark golden brown across the top means the outside has already given up its moisture, and no amount of storage trick will bring it back.
Cool the Cookies for the Right Texture
Let the cookies sit on the baking sheet for 2 minutes. That short rest lets the edges firm enough to move without breaking. Then transfer to a wire rack and cool completely, about 40 minutes.
Cooling on a wire rather than a plate matters more than it sounds. A rack lets steam escape from every side. Cookies stacked on a plate trap their own moisture, and the bottom ones turn soft and gummy while the top ones dry out.
Seal them only when they are completely cool. Warm cookies in a closed container sweat, and the condensation makes them sticky and wet within hours.
Common Mistakes
- Cookies spread flat into pancakes. The dough was too warm or the butter too soft. Chill the portioned balls for 15 to 30 minutes before baking, and stack them higher than they are wide.
- Cookies come out thick and cakey. Almost always too much flour, too much baking soda, or too long a bake. Check that your baking soda is not stale, measure flour by weight, and pull the tray two minutes earlier next time. A cakey crumb means the leavening gas expanded all the way through instead of only at the edges.
- Cookies are fine warm, then hard the next morning. This is a storage problem, not a baking one. Cool them fully, seal them airtight, and put a slice of plain bread in the container. The bread gives up moisture to the cookies slowly and they drink it back in.
- Every cookie is crisp all the way through. You baked them past done. Lower the temperature by 25F, check at 10 minutes instead of 14, and remove while the centers still look underdone. A soft tortilla or a slice of bread is the same idea, and you can use one of those instead of bread.
- The center is gummy and sticky. Underbaked on the underside or baked on a crowded sheet. Give each cookie 2 inches of space so heat circulates, and use the bottom of the sheet rather than the broil.
- There are so many chips the cookies taste mostly of chocolate. Cut the chocolate back to about 140 grams. It still looks generous because the dough is pale.
- The cookies are chewier than anyone wanted. Less common, but it happens with bread flour, an extra yolk, and a very short bake all stacked together. Dial one back. Use all-purpose flour and keep the yolk.
A few other notes. If you bake above about 5,000 feet, add 2 tablespoons of flour per cup, cut the baking soda by a quarter, and raise the oven temperature by 25F, because thin air dries dough out faster and makes cookies spread more. Swap in 1-for-1 gluten-free flour that includes xanthan gum if you need a gluten-free batch, and treat it as more fragile when you roll the mounds.
For a game-day or cookout table, this dough freezes well as scooped balls. Freeze on a tray until solid, transfer to a bag, and bake from frozen, adding 2 to 3 minutes to the bake time. That gets you warm cookies without standing at the oven.
Frequently Asked Questions
Why are my chocolate chip cookies hard after baking?
If they are hard the moment they leave the oven, they were baked too long or too hot. Pull the tray while the centers still look pale and matte, since the cookies keep cooking on the pan for a couple of minutes. If they are chewy at first and hard the next day, the moisture escaped in storage. Cool them fully, then seal them airtight with a slice of plain bread in the container.
Can I use melted butter instead of softened butter?
Yes, and for chewy cookies melted is usually better. Cool the melted butter to just warm before adding the sugar, because very hot butter will melt the sugar and make the dough greasy. Beat the butter and sugars together for at least 3 minutes so the mixture is smooth and glossy before the egg goes in. That emulsion is what holds moisture in the finished cookie.
How long should chocolate chip cookie dough chill before baking?
Thirty minutes is the practical minimum and it does most of the work, because cold butter is what stops the dough from spreading. Chilling up to 72 hours goes further: the flour hydrates, the flavor develops, and the cookies bake with more body. If you only have 20 minutes, that still helps. Skip chilling entirely and you are more likely to get thin, crisp cookies.
Can I make chocolate chip cookies from scratch without baking soda?
You can, but expect a denser, flatter, more biscuit-like cookie rather than a thick chewy one. Baking soda is what lifts the dough and creates the slightly compressed, fudgy interior. Cornstarch does some of the same job more gently, so replacing the soda with an extra tablespoon of cornstarch gives a tighter crumb without the sponginess. A pinch of baking powder is not a substitute; it will push the cookies toward cakey.
How do I know when chewy chocolate chip cookies are done?
Look at the edges, not the clock. They should be set and just turning golden, with centers that still look pale, slightly domed, and matte. Dark brown across the top means the moisture is already gone. Start checking at 12 minutes, since ovens run hot or cool by 25F or more, and remove the tray one to two minutes before it looks finished to you.
Can I freeze chocolate chip cookie dough?
Yes, and it is the easiest way to bake fresh cookies weeks later. Scoop the dough into balls, freeze them on a tray until solid, then move them to a freezer bag. They keep for about three months. Bake straight from frozen on a lined sheet, adding 2 to 3 minutes to the bake time and keeping the spacing. Thawed dough balls spread and bake unevenly, so do not let them sit out first.
Start with three changes to your current recipe: measure the flour by weight, swap in the extra egg yolk, and pull the tray two minutes early. Those three alone fix most of the cakiness and crispness people complain about. Then protect the result: cool the cookies fully, seal them airtight, and toss in a slice of bread. That is how to make chocolate chip cookies that stay chewy from the oven all the way to day three.