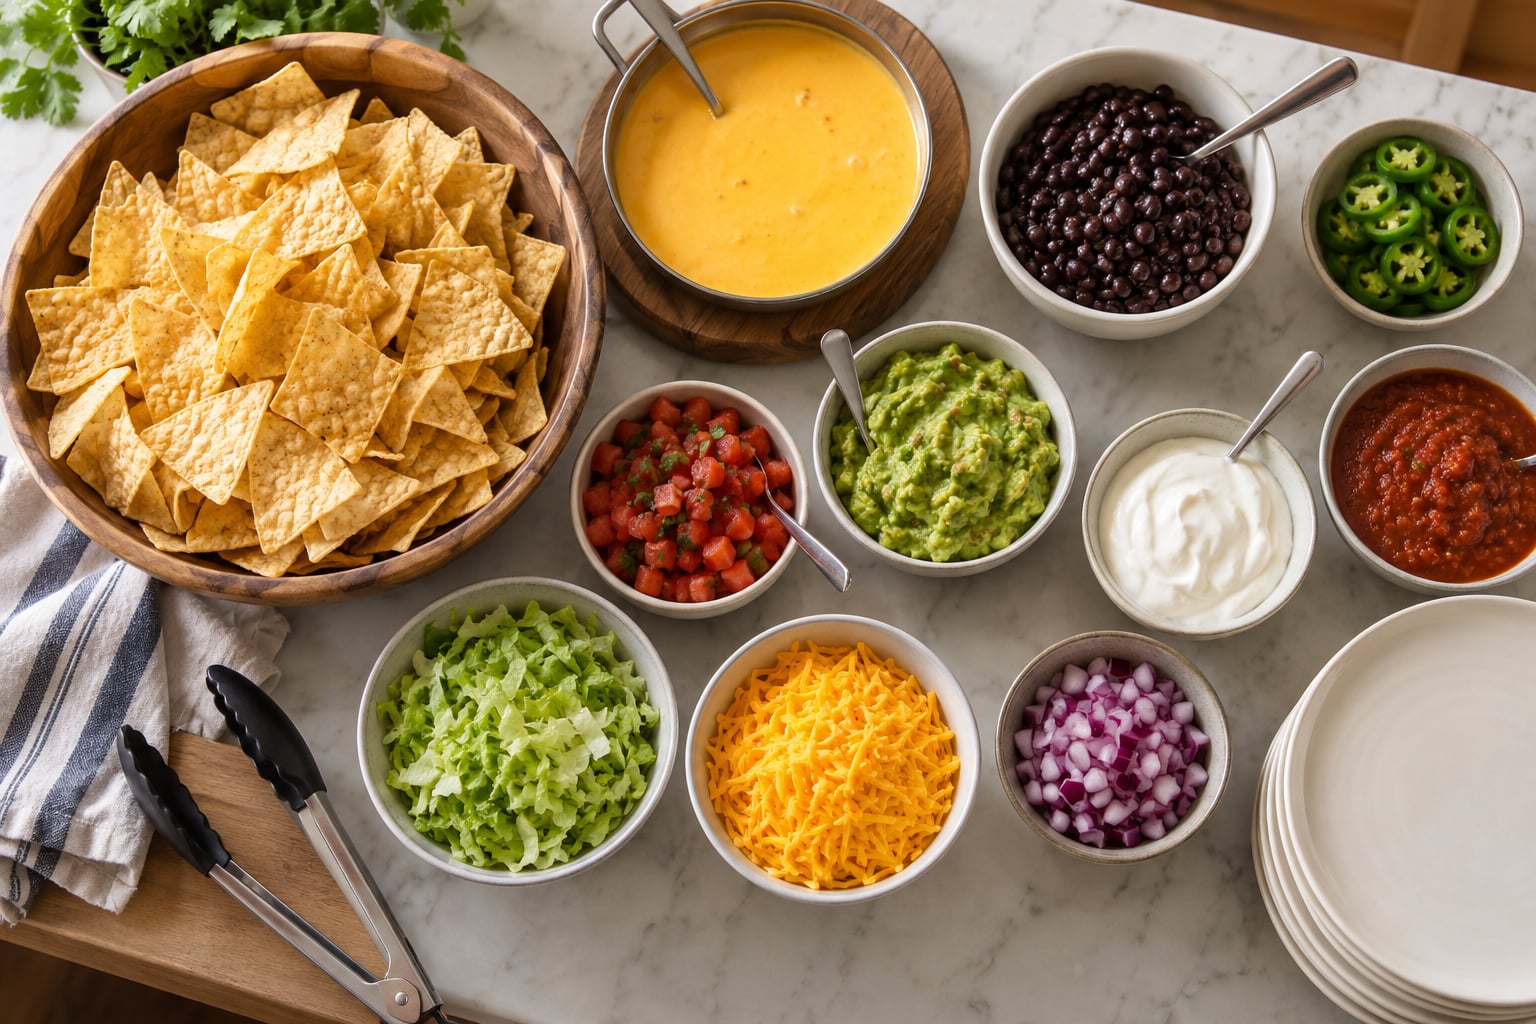
The fastest way to make a nacho bar for guests is to run one counter in a single direction: tortilla chips at the start, warm cheese and protein in the middle, cold toppings set over ice beside them, then plates, napkins and forks at the far end. Plan roughly 2 ounces of chips per adult, and give yourself about 90 minutes of setup before anyone arrives.
It is the least fussy party food I know. Nobody waits for a plate to come out of the kitchen, nobody has to be told how to assemble anything, and every bit of the mess happens inside one defined area of the counter.
A word of caution up front: a nacho bar is an appetizer spread, not a dinner. If your guests show up genuinely hungry, put something substantial on the table too and treat the bar as the thing they graze at while they wait.
Table of Contents
- What You Need
- Step-by-Step
- Step 1: Plan the Bar for Your Guest Count
- Step 2: Set Up the Serving Station
- Step 3: Warm the Chips and Cheese Safely
- Step 4: Prepare and Arrange the Toppings
- Step 5: Add Sauces, Extras, and Clear Labels
- Step 6: Build, Serve, and Refresh the Bar
- Common Mistakes
- Frequently Asked Questions
- How much nachos should I make for a nacho bar?
- Can I set up a nacho bar ahead of time?
- How do I keep tortilla chips from getting soggy?
- What are the best toppings for a nacho bar?
- How long can nacho toppings sit out safely?
- Conclusion
What You Need
For six to eight guests, this is the list I build from. Quantities scale linearly, so multiply by headcount and round up rather than trying to be clever with fractions.
- Chips: 12 to 16 ounces, about two standard bags. Pick sturdy, medium-thick corn chips; thin ones shatter under a layer of toppings.
- Shredded cheese: 8 to 12 ounces of a cheddar and Monterey Jack blend, roughly 2 to 3 cups.
- One protein: 1 pound of browned ground beef, shredded chicken or carnitas.
- Beans: one 15-ounce can of black beans or refried beans, warmed through.
- Sauces: two or three total, such as a red salsa, salsa verde and guacamole.
- Fresh toppings: diced tomatoes, sliced jalapenos, sliced black olives, shredded lettuce, chopped cilantro and scallions.
- Extras: sour cream, lime wedges and hot sauce.
- Equipment: two rimmed sheet pans, one or two warming trays or chafing dishes, a cooling tray or a couple of ice packs, tongs and serving spoons for every bowl, a stack of small plates, napkins and a roll of paper towels.
- Small labels or index cards plus a marker, for topping names and heat levels.
Two things buy you back real time later. Buy the non-perishables a few days ahead, since chips and shelf-stable cheese are easy to grab whenever they are on sale, and do all your chopping and meat cooking the day before. What you should not do the night before is assemble anything.
Keep raw and cooked meat separate, and refrigerate anything cut or seasoned until about an hour before service. If you are cooking meat the day before, cool it in shallow containers within two hours and put it straight in the fridge rather than leaving it on the counter overnight.
Step-by-Step
Step 1: Plan the Bar for Your Guest Count
Budget about 2 ounces of chips per adult and closer to 1 ounce per child, then add 15 percent for seconds and the inevitable person who loads nachos like they are building a fence. That means two generous bags for eight adults, or one bag plus a large bowl you refill from a hidden backup for a smaller group.
Count on 5 to 7 topping choices for a party of under 20 people. Past that, add a station rather than a bowl; a dozen small bowls in a row slows everyone down and creates the exact problem hosts complain about, where people grab one chip of everything and the bar is picked clean in twenty minutes.
Here is how to make a nacho bar for guests with mixed tastes without doubling your shopping list: run one mild base everyone can eat, one spicy item set apart, one clearly vegetarian protein, and one meat protein. Guests then assemble combinations instead of arguing over whose bowl is whose.
Step 2: Set Up the Serving Station
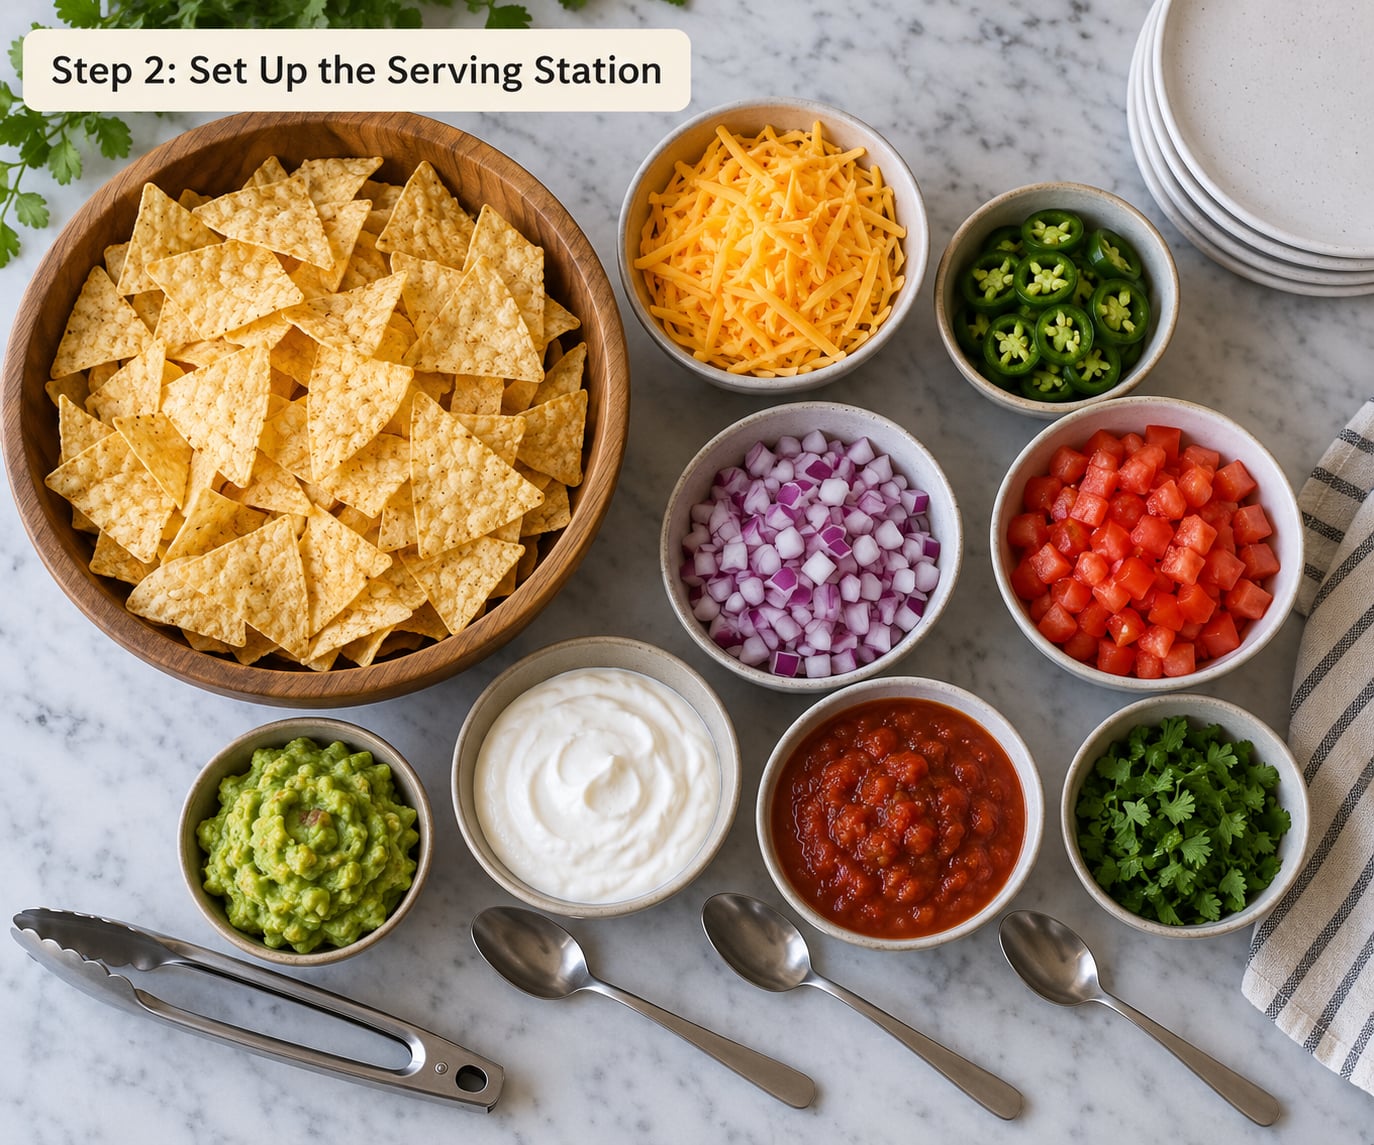
Pick a surface roughly four feet long for six to eight people, longer for a crowd, and put it somewhere guests can reach from both sides if you have to. A kitchen island or a dining table works better than a crowded sideboard, because the whole point is that people move.
Work from one end to the other. Chips and a serving spoon first, then beans, then warm cheese and protein, then the cold toppings sitting in bowls on ice, then the sauces and extras, then plates, forks and napkins. Plates go at the very end so guests carry a finished plate away from the food rather than through it.
Give every bowl its own spoon or tongs. That one small rule removes most of the awkwardness at a self-serve station, because nobody has to fish around in the same guacamole everyone else is reaching into.
Step 3: Warm the Chips and Cheese Safely
Chips are the hardest part to keep right. Warming trays with a light on will keep chips soft within about an hour, so use a warming tray for the cheese and hold the chips at room temperature in a covered bowl, replenishing in small amounts as the bar runs.
If you want warm chips, spread them on a single layer on a sheet pan and bake at 350 F for five minutes, then bring the pan out in small batches. Do not dump the whole bowl in at once; the ones underneath steam themselves soft.
Melt shredded cheese directly on the pan for a few minutes, or use a small saucepan over low heat with a splash of milk if you want it pourable. Low and slow beats high heat here, because hot spots are what make cheese clump and turn rubbery.
For any meat topping, cook it to temperature and check it. Ground beef needs to reach 160 F, ground poultry 165 F, and whole cuts of beef, pork, lamb or fish 145 F followed by a three-minute rest. Keep cooked meat at or above 140 F in a chafing dish or crock pot and discard anything that has been sitting at room temperature for over two hours.
Step 4: Prepare and Arrange the Toppings
Group toppings by type and by how they behave. Dry, crunchy items go together: olives, corn, shredded lettuce, cheese and pickled jalapenos. Wet, perishable items go together and stay cold: chopped tomatoes, pico de gallo, guacamole and sour cream.
Keep the wet stuff on ice. A rimmed tray with a bag of ice underneath or two frozen gel packs tucked under the bowls will hold guacamole and sour cream at a safe temperature for a couple of hours, and it costs nothing extra.
Chop tomatoes, onions and peppers the day before and store them covered in the fridge. Keep the batch modest and add a second smaller batch from the fridge about an hour into the party instead of putting out one huge bowl that slowly goes warm and watery.
Step 5: Add Sauces, Extras, and Clear Labels
Two or three sauces is plenty. A red salsa, a green salsa verde and guacamole covers the range, and adding a fourth usually means one bowl of a condiment nobody touches all night.
Offer two or three extras alongside: sour cream, lime wedges and a hot sauce are the ones that get used. Put lime wedges in a small dish rather than scattering them, and skip the pickled onions unless you already know your crowd likes them.
Use small index cards or printed labels for anything a guest might hesitate over. Mark the hot items clearly, name the vegetarian protein and the gluten-free one, and flag the eight common allergens: dairy, wheat, soy, egg, fish, shellfish, tree nuts and peanuts. A written line on the counter keeps the guessing to zero and costs you a marker and five minutes.
Step 6: Build, Serve, and Refresh the Bar
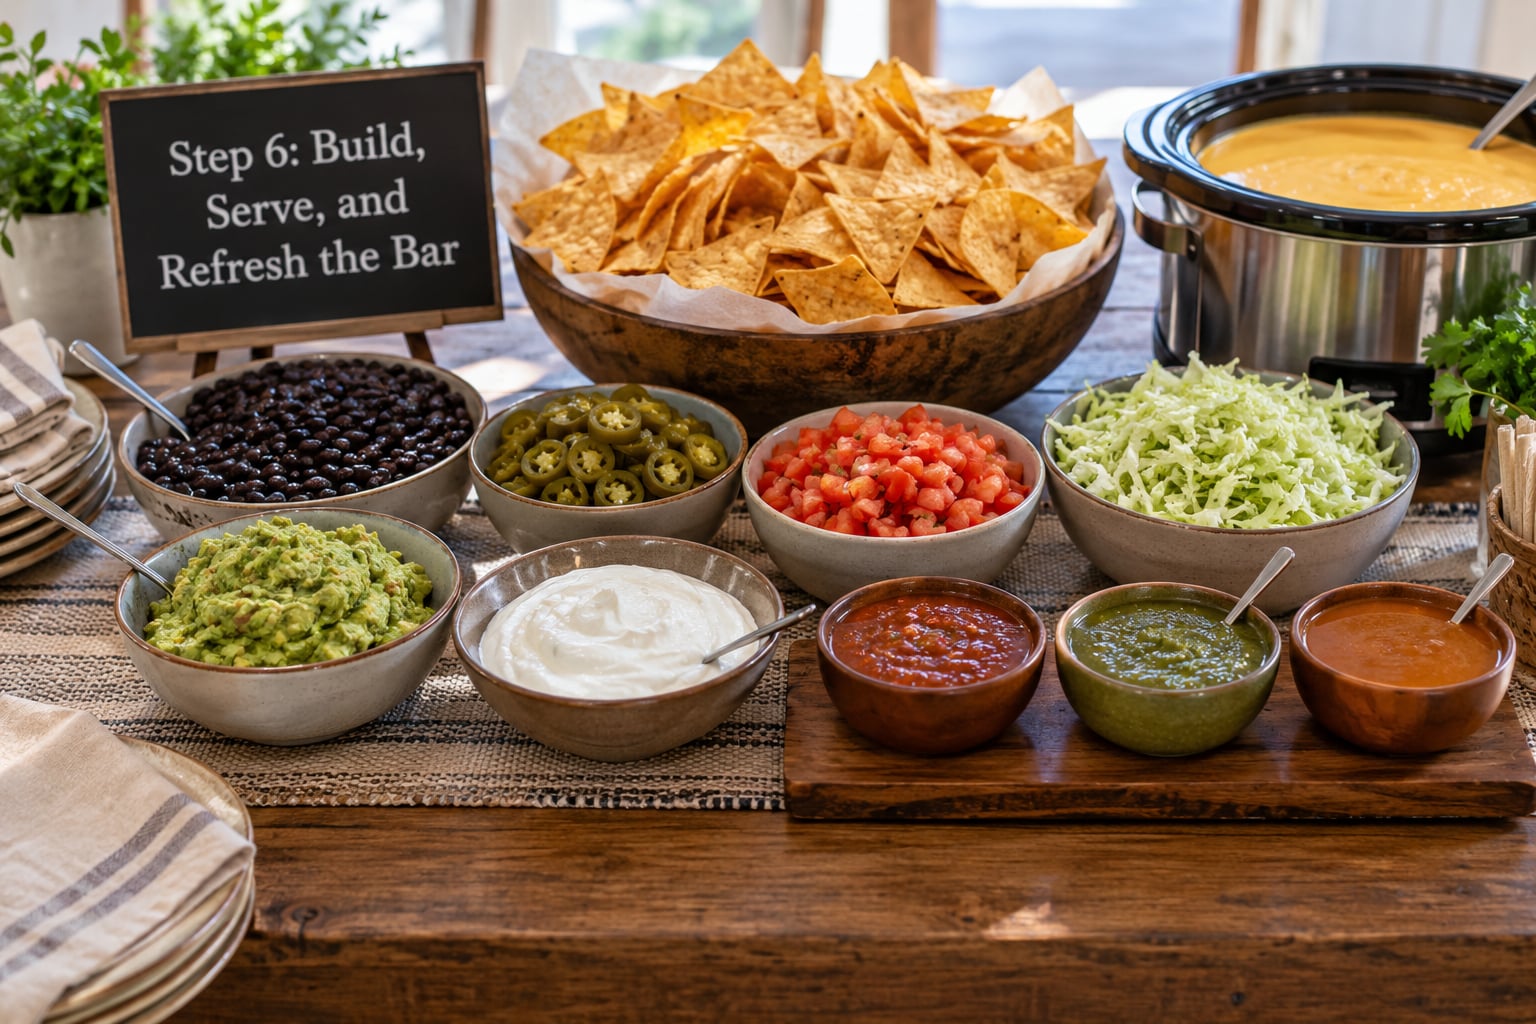
A well-loaded plate is about half a cup of chips, a quarter cup of cheese, and two or three toppings each. That ratio keeps the bar moving, because guests build with one hand and walk away rather than standing at the counter chewing.
Let guests top their own plates, with one exception: if you are serving to a seated crowd rather than a standing party, build and pass. For a game-day table where people are watching the screen, a plate that travels with them beats a trip back to a wilting pile of chips.
Plan the refresh rather than reacting to it. Bring out a fresh bowl of chips when the first one is about half gone, top up cheese and protein as the warm dishes run low, and slide a fresh tray of cold toppings out at the halfway mark. Hide the backup bags and containers under the table so restocking takes a trip, not a scramble.
Keep a wet towel or paper towel roll within reach and a trash bin at the end of the line. Most of the mess complaints I have seen come from missing napkins and nowhere to put an empty plate, not from the nachos themselves.
Common Mistakes
Soggy chips. Fix: keep chips dry and separate from every wet item, hold them at room temperature in a covered bowl rather than in a warming tray, and skip the fountain-style self-serve bowl where people scoop chips with the same wet serving spoon used for guacamole. Refresh in small batches instead of restocking the big bowl.
Clumped or rubbery cheese. Fix: melt over low heat with a splash of milk, and stir often. Shred your own if you can; pre-shredded cheese has anti-caking agents that turn grainy under long heat.
Overcrowded platters. Fix: five to seven toppings for a party under 20, and a separate second bar once you pass 40 guests rather than one long row of eighteen bowls. A second table with its own plates and napkins halves the traffic at the main one.
Ignored dietary needs. Fix: build one clearly labeled vegetarian or vegan protein and one gluten-free base, and keep them in their own bowls with their own utensils so nothing crosses over. You do not need a separate station for each diet; you need one honest label per item.
Slow service. Fix: plates at the end of the line, a dedicated utensil per bowl, and pre-portioning chips onto small plates in advance if you are feeding 40 or more. That trick came from a wedding forum thread and it works, because guests add toppings without handling the base.
Unsafe holding temperatures. Fix: hot protein and cheese above 140 F, cold dips under 40 F, and anything perishable tossed after two hours at room temperature, or one hour if you are outside and the air is above 90 F. Set a phone alarm for the halfway mark if the party runs long.
The general trick that fixes most of these: prepare every component ahead in separate containers and assemble the bar in small batches during the last hour. Most of the stress comes from trying to cook and serve at the same time.
Frequently Asked Questions
How much nachos should I make for a nacho bar?
Plan about 2 ounces of tortilla chips per adult and 1 ounce per child, plus 15 percent for seconds. That works out to roughly two standard bags for eight adults, or one bag for a group of four. For cheese, budget 2 to 3 ounces per adult. Add roughly 4 ounces of meat and 3 ounces of beans per person if you are serving a full bar rather than just chips and cheese. Scale every number proportionally and round up to whole bags and cans.
Can I set up a nacho bar ahead of time?
Partly, and knowing which part matters. Buy chips, shelf-stable cheese, canned beans and sauces days ahead, and cook your meat and chop your vegetables the day before, storing them covered in the fridge. Do not set the counter itself up early. Chips go into bowls, cold toppings go over ice and the chafing dish gets lit within about an hour of guests arriving, so anything more than that and the chips turn soft.
How do I keep tortilla chips from getting soggy?
Keep chips dry, covered and away from every wet ingredient. Holding trays soften chips within about an hour, so keep them at room temperature in a covered bowl instead and refresh in small batches as the bar runs. Never let guests scoop chips with a wet serving spoon, and never put guacamole, salsa or sour cream on the same platter as the base. If you want warm chips, bake a small batch at 350 F for five minutes.
What are the best toppings for a nacho bar?
The ones people actually use are shredded cheese, a meat protein such as ground beef, shredded chicken or carnitas, black or refried beans, jalapenos, diced tomatoes, sliced black olives, shredded lettuce and cilantro, with guacamole and sour cream on the side. Keep it to about five to seven choices for a small party. Simple beats elaborate, and chips, cheese, jalapenos and guacamole alone will satisfy most guests without any fuss.
How long can nacho toppings sit out safely?
Perishable toppings such as guacamole, sour cream, salsa, pico de gallo, chopped tomatoes and cooked meat should not sit at room temperature longer than two hours, and only one hour if the outdoor air is above 90 F. Keep hot items at 140 F or above in a chafing dish and cold dips under 40 F on ice, and set a phone alarm for the halfway point of your party so you know when to swap in fresh batches.
Conclusion
How to make a nacho bar for guests comes down to four things: prep the toppings ahead, keep the chips dry and separate, work in small batches, and arrange everything in the order guests need it, from chips to plates.
Start by counting heads and buying two standard bags of sturdy corn chips for every six to eight adults, plus a fifteen percent cushion. Everything after that is just placement.