Learning how to make fall off the bone ribs comes down to three levers: a low oven, a long cook, and a tight foil wrap that traps steam. Cook a rack at 275F for roughly three hours wrapped in heavy-duty foil, and the collagen in the meat slowly turns into gelatin until the bone releases with almost no resistance. No smoker, no grill, no babysitting.
The whole thing takes about four hours start to finish, and most of that is hands-off oven time. The part that trips people up is not the cooking. It is stopping at the right moment instead of baking until the meat crumbles.
Table of Contents
- What You Need
- Step-by-Step: How to Make Fall Off the Bone Ribs
- 1. Prepare and Trim the Ribs
- 2. Season the Ribs
- 3. Slow-Cook Them Until Fall-Off-the-Bone
- 4. Wrap and Braise for Tenderness
- 5. Glaze, Rest, and Serve
- Cook Times and Temperatures by Rib Cut
- Common Mistakes and Fixes
- Frequently Asked Questions
- Can I make fall off the bone ribs ahead of time?
- How should cooked ribs be stored and reheated?
- What is the safe internal temperature for pork ribs?
- Can I use barbecue sauce during the long cooking stage?
- Can I cook ribs on a grill and finish them in the oven?
- How do I keep ribs tender without making them mushy?
- Conclusion
What You Need
Fall-off-the-bone ribs are a collagen problem, not a seasoning problem. Tough ribs mean the connective tissue never got enough time and moisture to break down, and no rub or sauce fixes that. So your equipment list is short.
- Rib cut. A rack of pork ribs. Baby back ribs are the most forgiving and the most tender. Spare ribs and St. Louis style ribs have more meat and need more time. Country style ribs are boneless cuts of the same area, usually sold in strips.
- Heavy-duty foil. Two sheets per rack, doubled, so the wrap does not split and leak rendered fat onto the oven floor. Standard grocery store foil works if you double it.
- Instant-read thermometer. This is the single tool that separates chewy ribs from tender ones. You want it for the sauce stage, the rest stage, and any batch that feels uncertain.
- Dry rub. Coarse salt, black pepper, brown sugar, smoked paprika, garlic powder, and a little cayenne. That is a workable base and costs almost nothing.
- Binder. Yellow mustard or a neutral oil. A thin layer, not a pool.
- BBQ sauce. About half a cup per rack. Add it late, never early, because sugar burns fast.
- Sharp knife and paper towels. For the membrane and for slicing between the bones.
- A rimmed baking sheet or roasting pan. Something the foil package can sit inside, in case juices escape.
On doneness, two different numbers matter and people mix them up constantly. The USDA safe minimum internal temperature for whole cuts of pork is 145F with a three minute rest. Tenderness, the texture where the bone pulls away cleanly, lives in a much higher window of roughly 190 to 203F. A rack can be perfectly safe to eat at 160F and still be chewy. Cook to safety first, then keep going to tenderness.
Baby back ribs are also the cut to use if you are nervous. They are smaller, they have less connective tissue to break down, and they are forgiving of a slightly higher temperature. Spare ribs can absolutely get as tender in a home oven, but they want more time and a cooler oven, and they punish rushing.
Step-by-Step: How to Make Fall Off the Bone Ribs
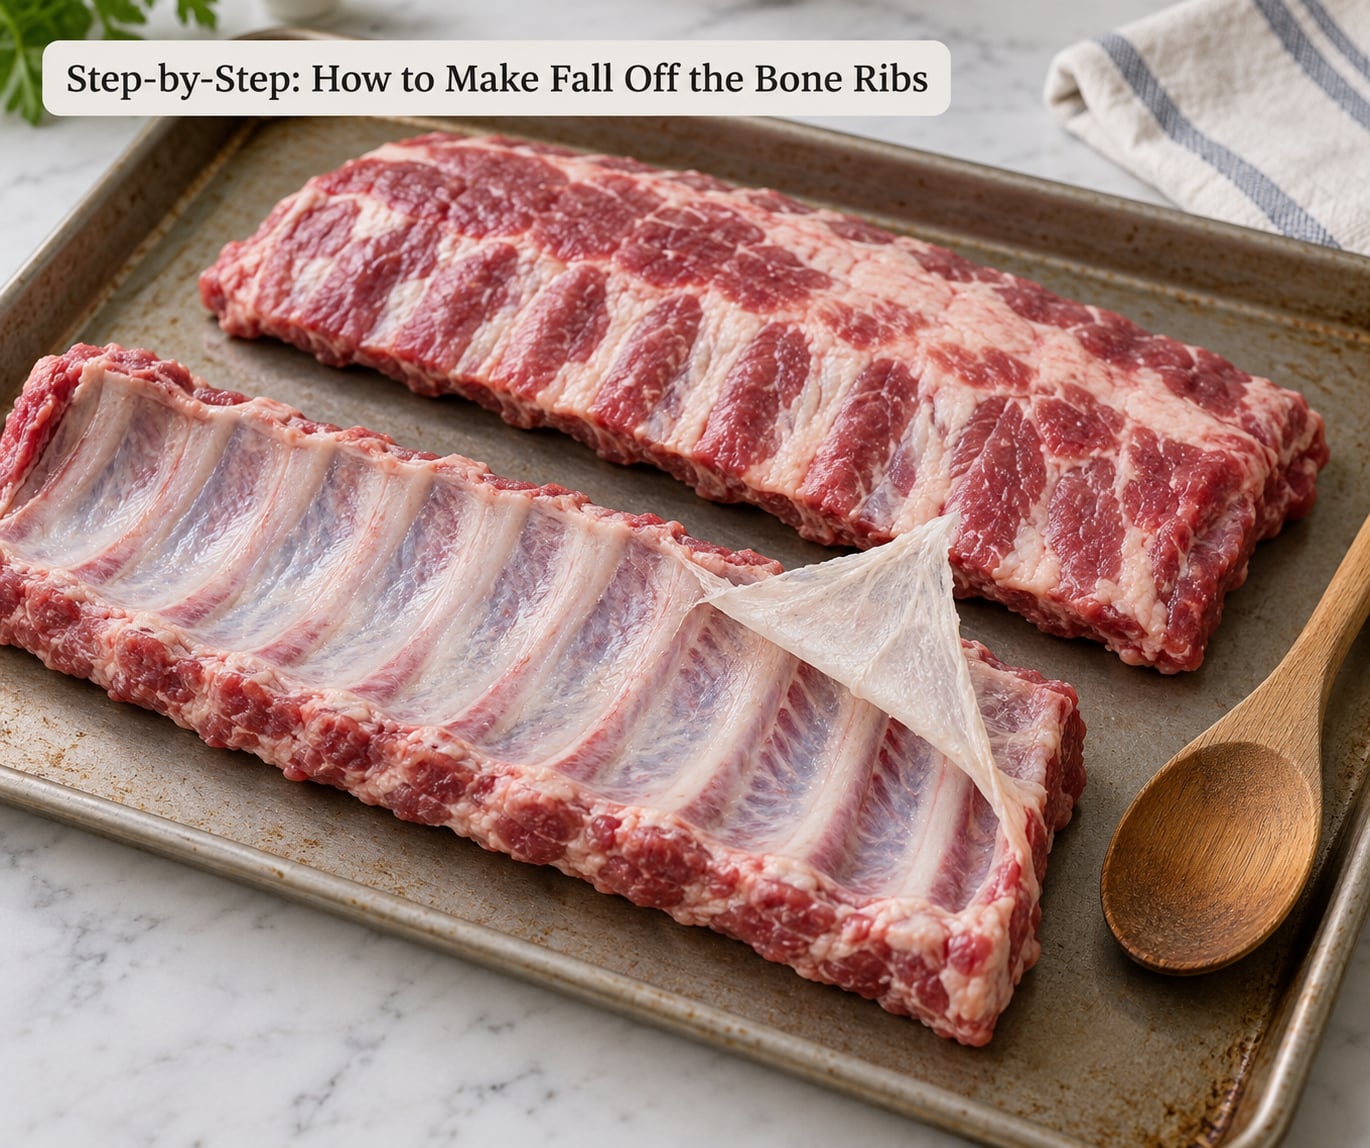
1. Prepare and Trim the Ribs
Rinse the rack under cold water and look for any loose bone fragments or thick patches of fat. Trim the fat cap down to a thin layer, but do not strip it bare. That fat renders during the long cook and bastes the meat.
Pat the rack dry with paper towels. Surface moisture is the enemy of good browning, and a wet rack will never form bark in the final stage.
Now the membrane. Grab a dry paper towel, pinch the loose edge of the silvery skin on the bone side, and pull. The towel gives you grip the wet membrane does not. If the membrane tears, use the back of a spoon to get under the corner and start again.
The membrane blocks seasoning from reaching the meat and holds moisture against the surface instead of inside the muscle. Removing it is not a fussy step. It is the difference between ribs that taste seasoned all the way through and ribs that taste seasoned only on top. If the membrane intimidates you, ask the butcher to remove it. Plenty of counter-service butchers will do it while you wait.
2. Season the Ribs
Mix the dry rub first: 2 tablespoons coarse salt, 2 tablespoons brown sugar, 2 teaspoons black pepper, 2 teaspoons smoked paprika, 2 teaspoons garlic powder, and a pinch of cayenne. Brown sugar is not there for sweetness, it is there for the crust it creates under the broiler.
Brush a thin coat of yellow mustard or oil over the entire rack, both sides. Then season the bone side first, working the rub into every crevice, and finish with the meat side. Seasoning the bone side matters because you will turn or lift those ribs to check them.
You have two seasoning paths and both work. A dry rub gives you bark and a clean, peppery crust. A wet marinade, mayo and vinegar based, gives you more moisture and less crust. Whichever you pick, save the BBQ sauce for the end. Sauce added at the start will scorch during a three hour cook and turn bitter long before the meat is tender.
3. Slow-Cook Them Until Fall-Off-the-Bone
Preheat the oven to 275F. Some ovens run cool, and some run hot, so if you own an oven thermometer put it in there now. A ten degree swing is the difference between great ribs and ribs that stall and then dry out.
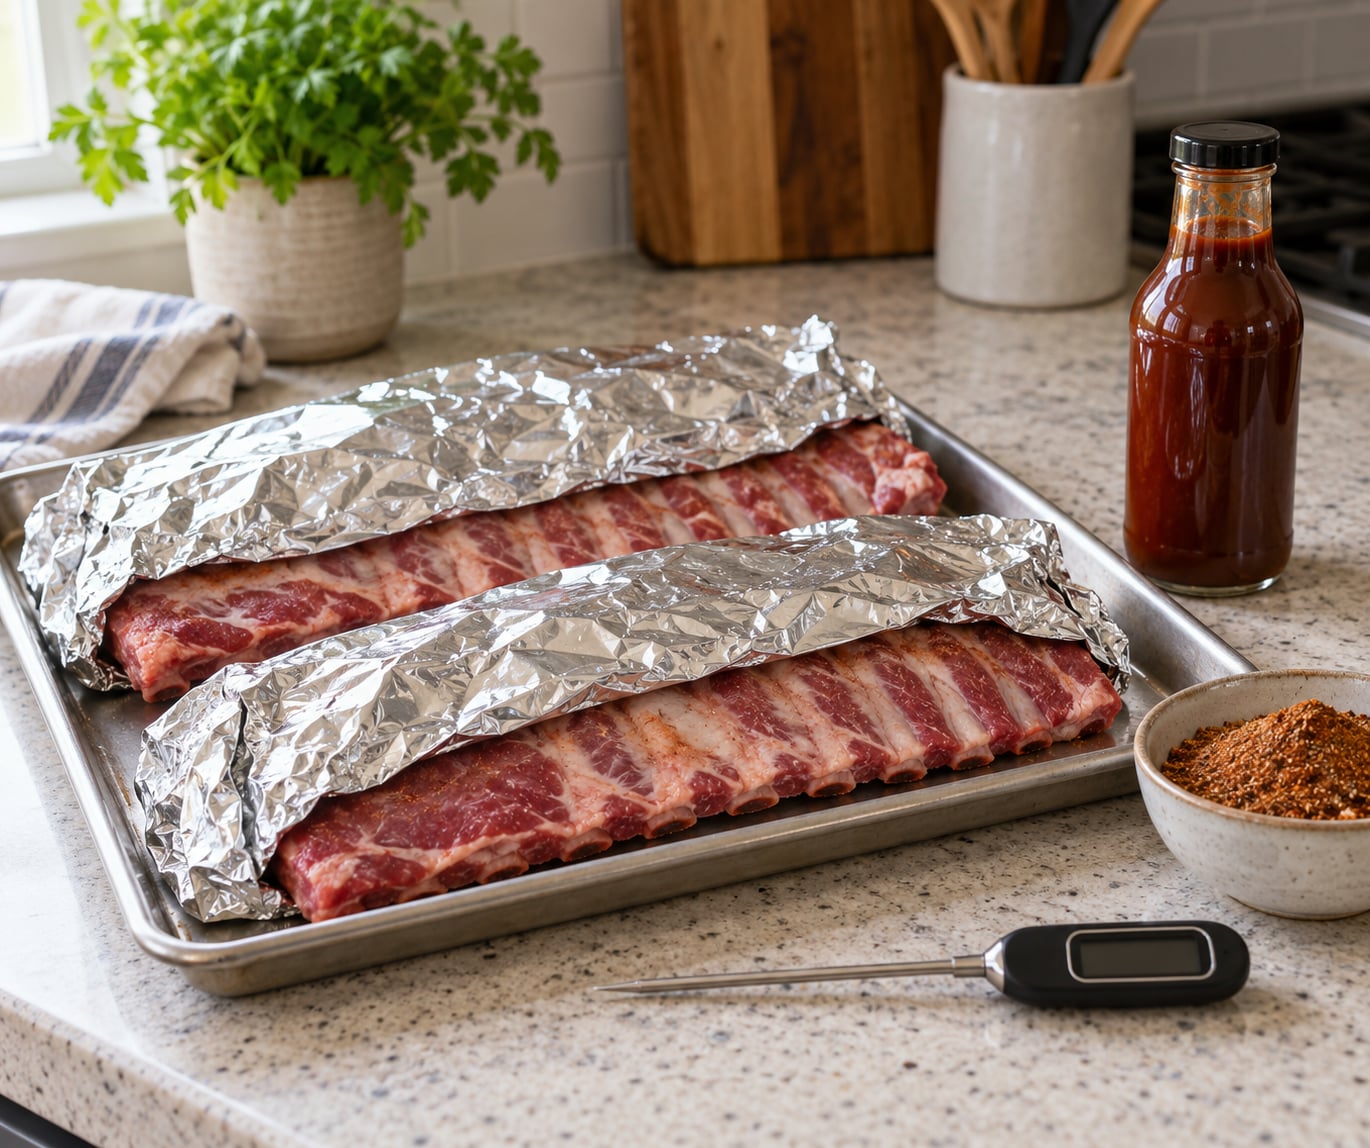
Lay two sheets of heavy-duty foil on a baking sheet, shiny side up. Set the rack on it meat-side down, with the bone side facing up. That placement matters. The flat rib bones shield the delicate meat from the direct heat of the element, and the rendered fat runs down the bones and into the foil instead of dripping onto the meat and washing off the rub.
Bring the foil up and over the rack and crimp the seams tightly on all four sides, then crimp again. You are building a sealed pouch. If the ribs are exposed to open oven air, the moisture leaves as steam and the meat firms up instead of relaxing.
Put the pan on the center rack, not the bottom, so heat circulates evenly. Cook for 2.5 to 3 hours for baby backs, 3 to 3.5 hours for St. Louis style, and 3.5 to 4 hours for spare ribs. These are starting points, not finish times. Timing is a hint. Texture is the answer.
Baby back ribs do not stall the way a large beef brisket does. What feels like a plateau around the two hour mark is usually just the oven doing its quiet work on connective tissue, so keep going.
4. Wrap and Braise for Tenderness
If the ribs have been in the oven a full two hours and still feel springy, the wrap is doing its job but the collagen needs more time. Add a splash of apple juice or water to the foil package, about a quarter cup, and seal it again. The liquid creates a steam environment inside the pouch and gives the collagen something to hydrate with.
Do not pour a large amount of liquid under the ribs. A thin layer of drippings and a splash of juice is plenty. Too much and the underside steams so hard the surface never sets, and you lose the crust entirely.
At the three hour mark, open a corner and slide a probe into the thickest part of the meat, between two bones. It should slide in with almost no resistance, the way a probe goes into a soft loaf. If it meets resistance, seal it back up and give it another 30 to 45 minutes. This is the moment people get wrong. Anyone following a two hour recipe and trusting it is why the most common complaint in every rib forum is great flavor and still chewy.
Once the probe slides freely, the collagen has converted to gelatin and the muscle fibers have let go of the bone. That is fall off the bone.
5. Glaze, Rest, and Serve
Open the foil fully and drain off any pool of fat. Brush a thin layer of BBQ sauce over the top, and use a light hand. Sauce that pools thickly will blacken before it sets.
Return the rack to the oven with the broiler on high for 2 to 4 minutes, watching it the entire time. Sugar goes from perfect to burned in about fifteen seconds of inattention. You want dark, blistered edges and a caramelized sheen, not a black crust.
Check the temperature again. Fall-off-the-bone texture usually lands in the 190 to 203F range, and you are looking for a number that matches a probe going in without any push.
Rest the ribs for 10 to 15 minutes on a cutting board. Resting lets the juices redistribute instead of running out onto the board the moment you cut. Skip it and you lose the juice you spent three hours creating.
To test the final result, lift one end of a bone and twist gently. The bone should release from the meat on its own. Then slice between the bones with a sharp knife, cutting from the back side toward the bone for a clean cut, or pull the whole rack apart with your hands if you want shreds for sandwiches.
Cook Times and Temperatures by Rib Cut
| Rib cut | Size and character | Oven temperature | Wrapped cook time | Best for |
|---|---|---|---|---|
| Baby back ribs | Small, curved, little meat | 275F | 2.5 to 3 hours | First-time cooks, fastest results |
| St. Louis style ribs | Trimmed spare, uniform | 275F | 3 to 3.5 hours | Even cooking, good sauce adhesion |
| Spare ribs | Long, large, heavy meat | 250 to 275F | 3.5 to 4 hours | Feed a crowd |
| Country style ribs | Boneless strips, no bones | 275F | 2.5 to 3 hours | Fast, family-friendly, no bone twisting needed |
If you want to compare ovens against other methods, slow cookers run on the same principle with a 4 hour setting on high or 8 hours on low, and pressure cookers cut the covered phase down to about 35 to 40 minutes. A smoker is the best tool for flavor, not the best tool for convenience.
Common Mistakes and Fixes
The ribs taste great and are still chewy. Almost always a time problem, not a heat problem. People unwrap after two hours and trust the timer. Give it another 30 to 45 minutes wrapped, and test with a probe instead of the clock.
The meat is dry and tight. The oven was too hot or the ribs sat uncovered too long. Cooking the whole session at 350F is the usual culprit, and a batch run hot and uncovered comes out dry every time. Drop the temperature to 275F, wrap tight, and shorten the uncovered window to a few minutes of broiling.
The sauce is burned. Sauce went on too early or the broil was unattended. Save it for the last four minutes and watch it. Thin layers char far less than thick ones.
The ribs cooked unevenly. Usually a crowded pan or a rack tucked against the oven wall. Two racks in a home oven will cook at different rates, so rotate them halfway through, or cook one rack at a time. Check your oven with a thermometer while you are at it.
The ribs stuck to the foil or the pan. Foil was not doubled, or the rack sat on a bare sheet. Put the foil shiny side up, and use a small spray of cooking oil on the meat side before it goes in.
Some racks are tender and others are not. Pack quality varies more than most recipes admit, and a lot of people notice it. A rack from the same store can turn out noticeably tighter than the one before it. The compensation is time, not heat. Give an underperforming rack another 30 minutes wrapped at 275F rather than cranking the temperature.
One debate worth naming: plenty of pitmasters argue that fall off the bone is not always a win. Plenty of home cooks push back that the texture has crossed into mush and lost its bite. Both are right, and the resolution is a narrow window. You want the bone to release with a gentle twist, not the meat to crumble when you look at it. Pull them the moment the probe slides freely. If the muscle shreds into paste as you lift the bone, you went ten minutes past.
A few habits that keep everything consistent: buy the same cut and size each time so your timings mean something, keep the oven steady for the whole covered phase, rest before cutting, and reheat gently next day. For reheating, cover the ribs and warm them in a 250F oven for about 20 minutes with a splash of juice in the pan. The microwave dries them out, and a hot skillet without liquid does the same.
Frequently Asked Questions
Can I make fall off the bone ribs ahead of time?
Yes, and they are actually better made a day ahead. Cook the wrapped phase through, cool the ribs in the pan juices, then refrigerate them covered. On serving day, reheat at 250F for about 20 minutes, brush with sauce, and broil for two minutes. Holding them warm in the oven for hours dries the surface out, so keep them in the fridge until the last minute instead.
How should cooked ribs be stored and reheated?
Move leftover ribs into a shallow airtight container and refrigerate within two hours, using them within three to four days. Reheat in a covered pan in a 250F oven, or in a covered skillet on the stove, adding a splash of apple juice or broth. Avoid the microwave, which heats unevenly and dries the meat. Reheated ribs will be a little firmer than fresh, so heat them only until hot.
What is the safe internal temperature for pork ribs?
The USDA safe minimum for whole cuts of pork is 145F measured at the thickest part, followed by a three minute rest. That is a food safety floor, not a tenderness target. Fall-off-the-bone texture usually shows up between 190F and 203F, where a probe slides into the meat between the bones with no resistance. Cook to 145F or above for safety, then continue to tenderness on your own judgment.
Can I use barbecue sauce during the long cooking stage?
You can, but most people regret it. Sugar in the sauce scorches during a three hour cook, especially where it drips onto the foil, and the result is bitter rather than tangy. If you like sauce in the covered phase, add a thin layer at the two hour mark rather than at the start. Most cooks reserve barbecue sauce for the last 10 minutes plus a two to four minute broil.
Can I cook ribs on a grill and finish them in the oven?
Yes, and it is a good hybrid when you already have a fire going. Smoke or grill the wrapped ribs at 250 to 275F until they are close to probe tender, usually two and a half to three hours depending on the cut. Then move them to a 275F oven for the last stretch, or finish them on the grill. Wrap them in foil for the oven finish so the meat does not dry out during the transfer.
How do I keep ribs tender without making them mushy?
Watch the texture, not the clock. Pull the ribs the moment a probe slides into the meat between two bones with no resistance at all, usually in the 190 to 203F range. Go further and the muscle fibers break down past the point where they hold any texture. Keeping the oven at 275F, wrapping tight, and broiling only at the very end all protect that window.
Conclusion
Season the rack, seat it meat-side down on doubled foil, and cook it at 275F for about three hours without opening the package. That is the whole method. The single step that decides the outcome is testing for tenderness with a probe instead of trusting a timer, then resting the ribs before you slice.
Your first move tonight is to pull that foil out and count the sheets. Everything after that is just waiting.