To make caramelized onions for burgers, slice two large yellow onions thin, cook them in a tablespoon of butter plus a tablespoon of oil over medium-low heat, and stir every ten minutes for 45 to 60 minutes until they are soft, jammy and deep golden brown. That is the whole technique. The patience is the technique.
Most people who dislike onions on a burger are not reacting to the onion flavor itself. They are reacting to a raw slice’s sharp bite. Cooking it down for the better part of an hour turns that bite into something sweet and savory that melts against a hot patty. It is worth the clock time, and you can make it a day or two ahead.
Table of Contents
- What You Need
- Step-by-Step
- Slice the Onions Thinly and Evenly
- Heat the Oil Without Smoking
- Cook the Onions Until Soft and Golden
- Add the Sweetener and Splash of Liquid
- Remove the Onions at a Deep Golden Color
- Season, Cool, and Store the Onions
- How They Belong on the Burger
- Common Mistakes
- Frequently Asked Questions
- How long do caramelized onions take for burgers?
- Can I make caramelized onions without sugar?
- What is the best onion to use for burgers?
- How do I keep caramelized onions from burning?
- Can I make caramelized onions ahead of time?
- Should I add caramelized onions before or after cooking the burger patties?
- Conclusion
What You Need
This makes about eight servings, roughly enough for two to three burgers each. Read the pan rule below before you start, because it is the single most common reason caramelizing goes wrong.
- 2 large yellow onions (about 1.5 to 2 pounds with the skins on)
- 1 tablespoon unsalted butter
- 1 tablespoon olive oil or another neutral oil with a high smoke point
- A generous pinch of kosher salt, plus more to finish
- 1 tablespoon brown sugar (optional, not required)
- A splash of water, stock or dry white wine (optional)
Tools: a wide cast-iron or stainless skillet at least 12 inches across, a sharp chef’s knife or a mandoline, and a wooden spoon. Cast iron is my pick because it holds heat and builds fond. A nonstick pan will still work, you just get less of the browned residue that flavors the finished onions.
Pan rule: no more than two large onions in a 12-inch skillet. A 10-inch skillet handles one large onion comfortably. If you crowd it, the onions steam in their own moisture instead of browning, and the whole thing takes twice as long.
Swaps: sweet onions like Vidalia or Walla Walla give you a sweeter, less pungent result and are worth using if you are cooking for people who do not like onions. Red onions are mild and pretty but turn a muddy brown, so use them for color rather than flavor. Shallots cook faster and smaller, so halve the batch time.
Step-by-Step
Slice the Onions Thinly and Evenly
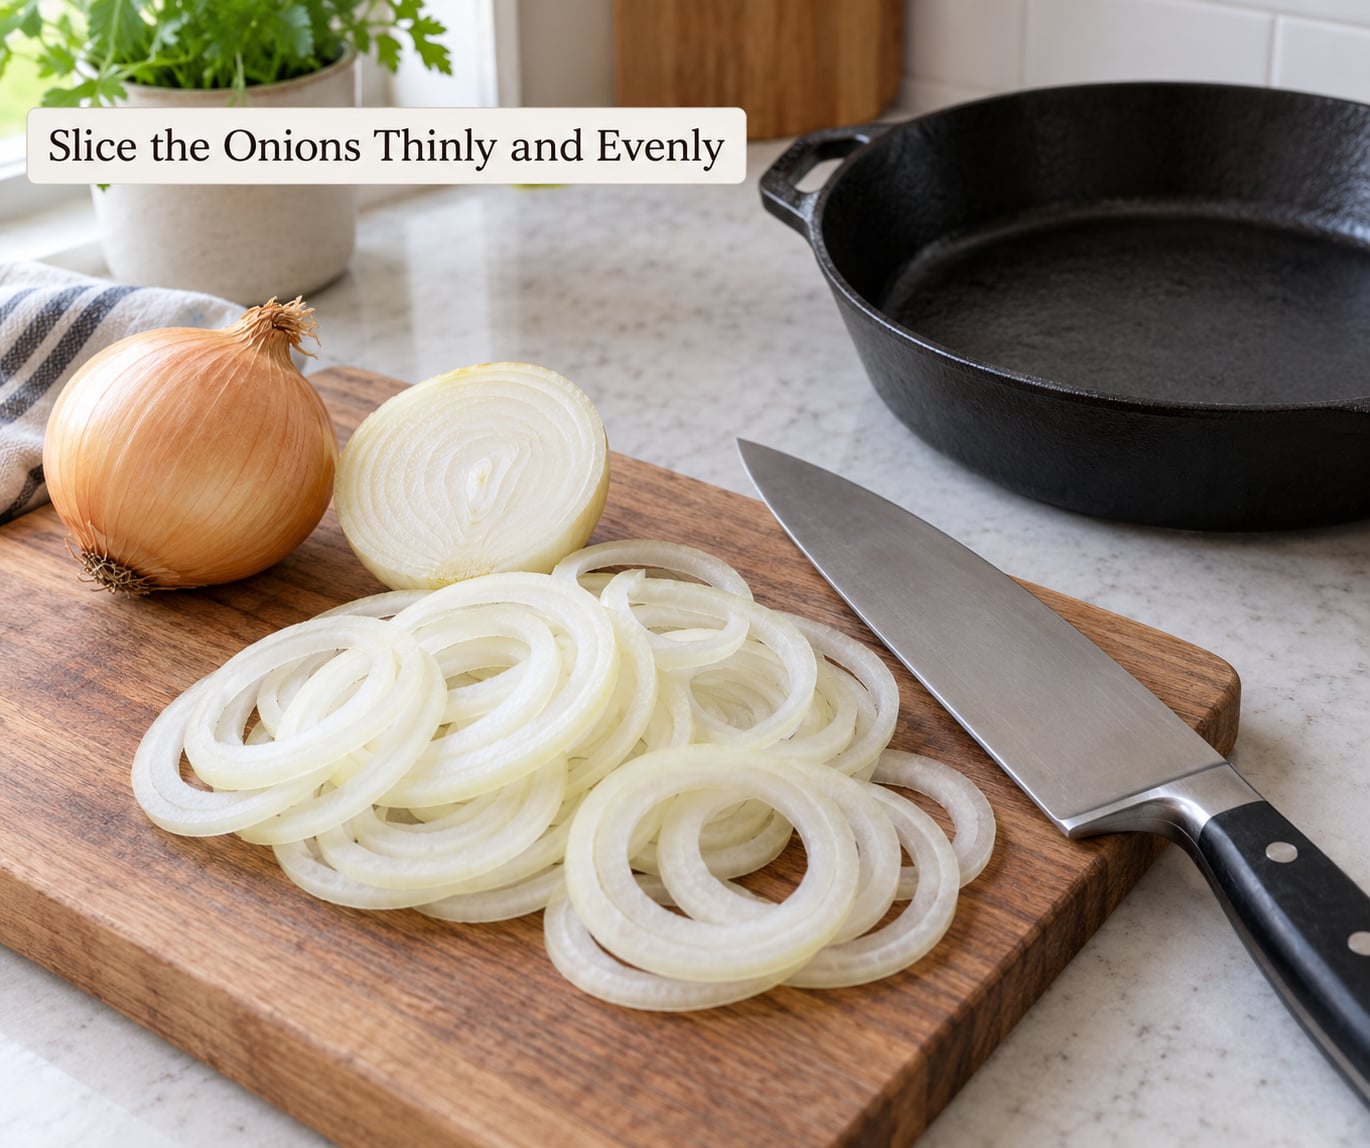
Halve each onion through the root, peel it, then cut it into even half-moons about an eighth of an inch thick. Slice with the grain of the layers rather than across them, which gives you long curved strands that hold their shape as they cook. Thick or ragged cuts are the reason a batch turns to mush in places while other pieces are still pale.
Heat the Oil Without Smoking
Set the skillet over medium-low heat and add the oil first, then the butter. Let the butter melt and foam until it just quiets down, about a minute. If the butter browns or the oil shimmers hard and you can see smoke, the pan is too hot. Pull it off the burner for a minute. Butter carries the flavor and oil raises the smoke point so the fat does not scorch before the slowest onion strand has softened.
Cook the Onions Until Soft and Golden
Spread the onions in an even layer, then leave the pan alone for a full ten minutes. Resist the urge to stir. During that first stretch the onions sweat, release water and soften, and that softening is the whole prerequisite for everything that comes next. After ten minutes, stir and scrape the bottom, then repeat every ten minutes.
Keep the heat at medium-low the whole time. You will see the onions go translucent, then slump, then dry out, then take on color. That sequence takes 45 to 60 minutes in most kitchens, and high heat does not speed it up, it just burns the outside before the inside catches up.
Add the Sweetener and Splash of Liquid
Around the 30 minute mark, when the onions are soft and pale gold with no standing liquid in the pan, scatter in the brown sugar if you are using it and stir. It adds a deeper, almost molasses note, but it is not what caramelizes the onions. Onions have plenty of natural sugar on their own. Skip it entirely and nothing is lost.
This is also the moment to deglaze. Add a splash of water, stock or a dry white wine and scrape the bottom of the skillet to lift the fond, those dark browned bits stuck to the pan. That fond is where a lot of the flavor lives. Use about a quarter cup, let it bubble away, and add a second splash if the bottom starts looking dry or the onions threaten to catch.
Remove the Onions at a Deep Golden Color
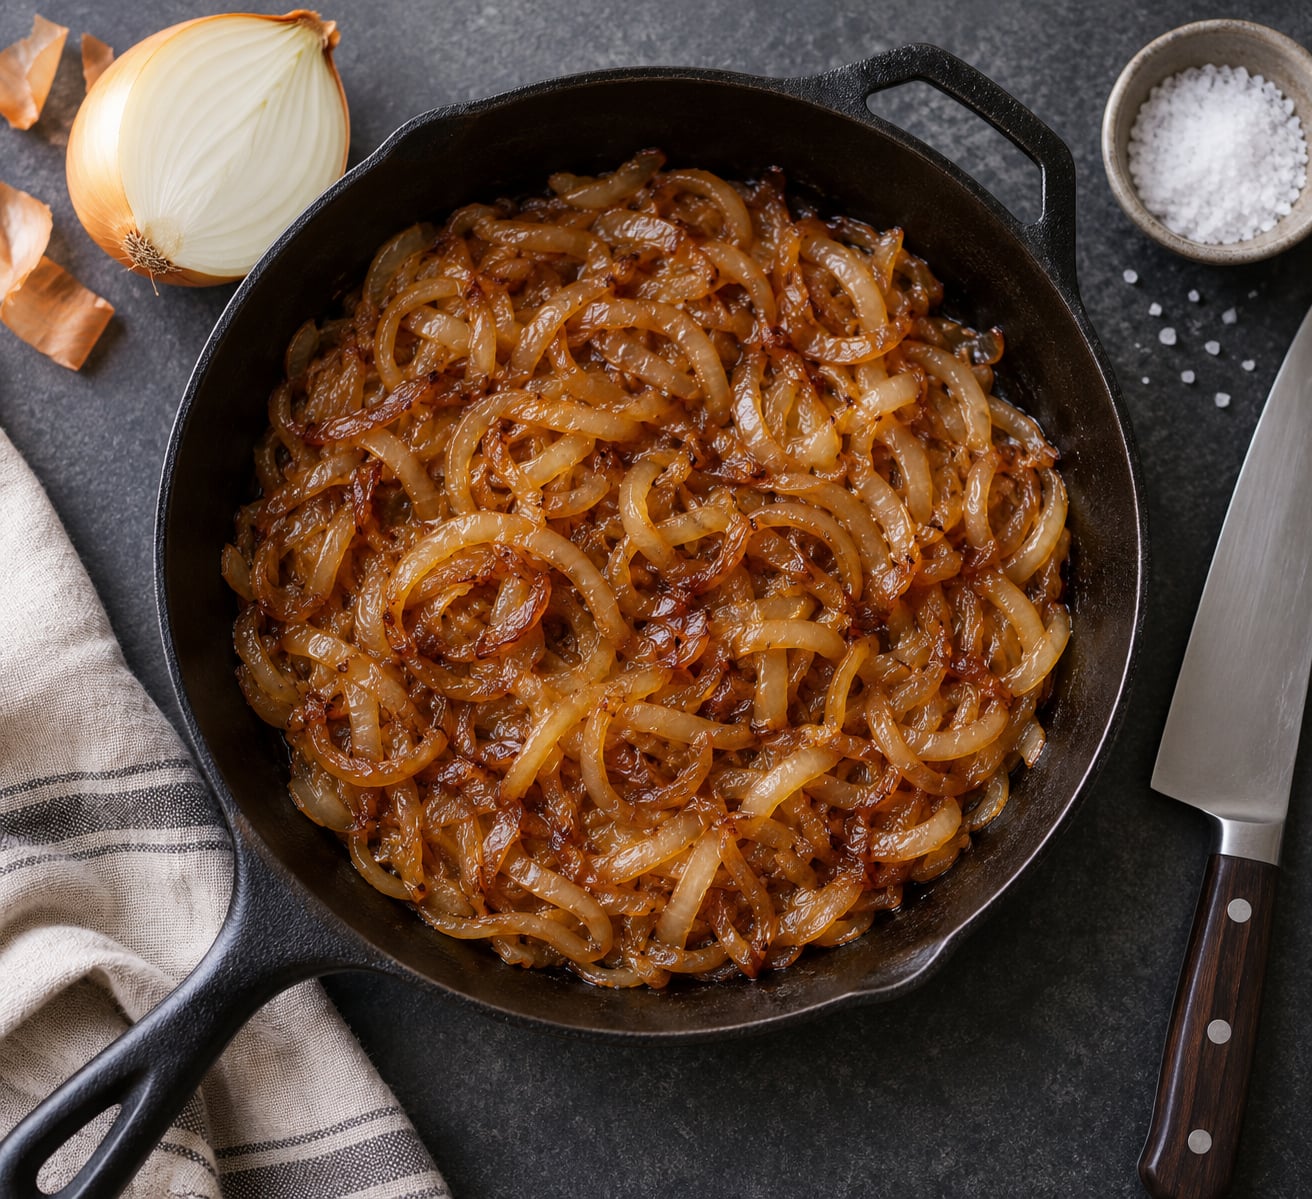
They are done when the color is a deep amber brown, close to the color of a well-baked cookie crust, and the strands hold together but bend easily. They should smell nutty and sweet rather than acrid. Turn the heat up to medium for the final two or three minutes if the color is lagging, because at this point there is little water left to slow the browning.
The wrong finish looks different every time. Pale yellow with a raw edge means the heat was too high and the onions burned unevenly. Grey or dull brown means the pan was crowded or unsalted and the onions cooked in their own water. Blackened bits and a sour smell mean they went too far and the sugars turned bitter. Pull them a shade before you think you want them, since the pan keeps cooking for a minute after it leaves the burner.
Season, Cool, and Store the Onions
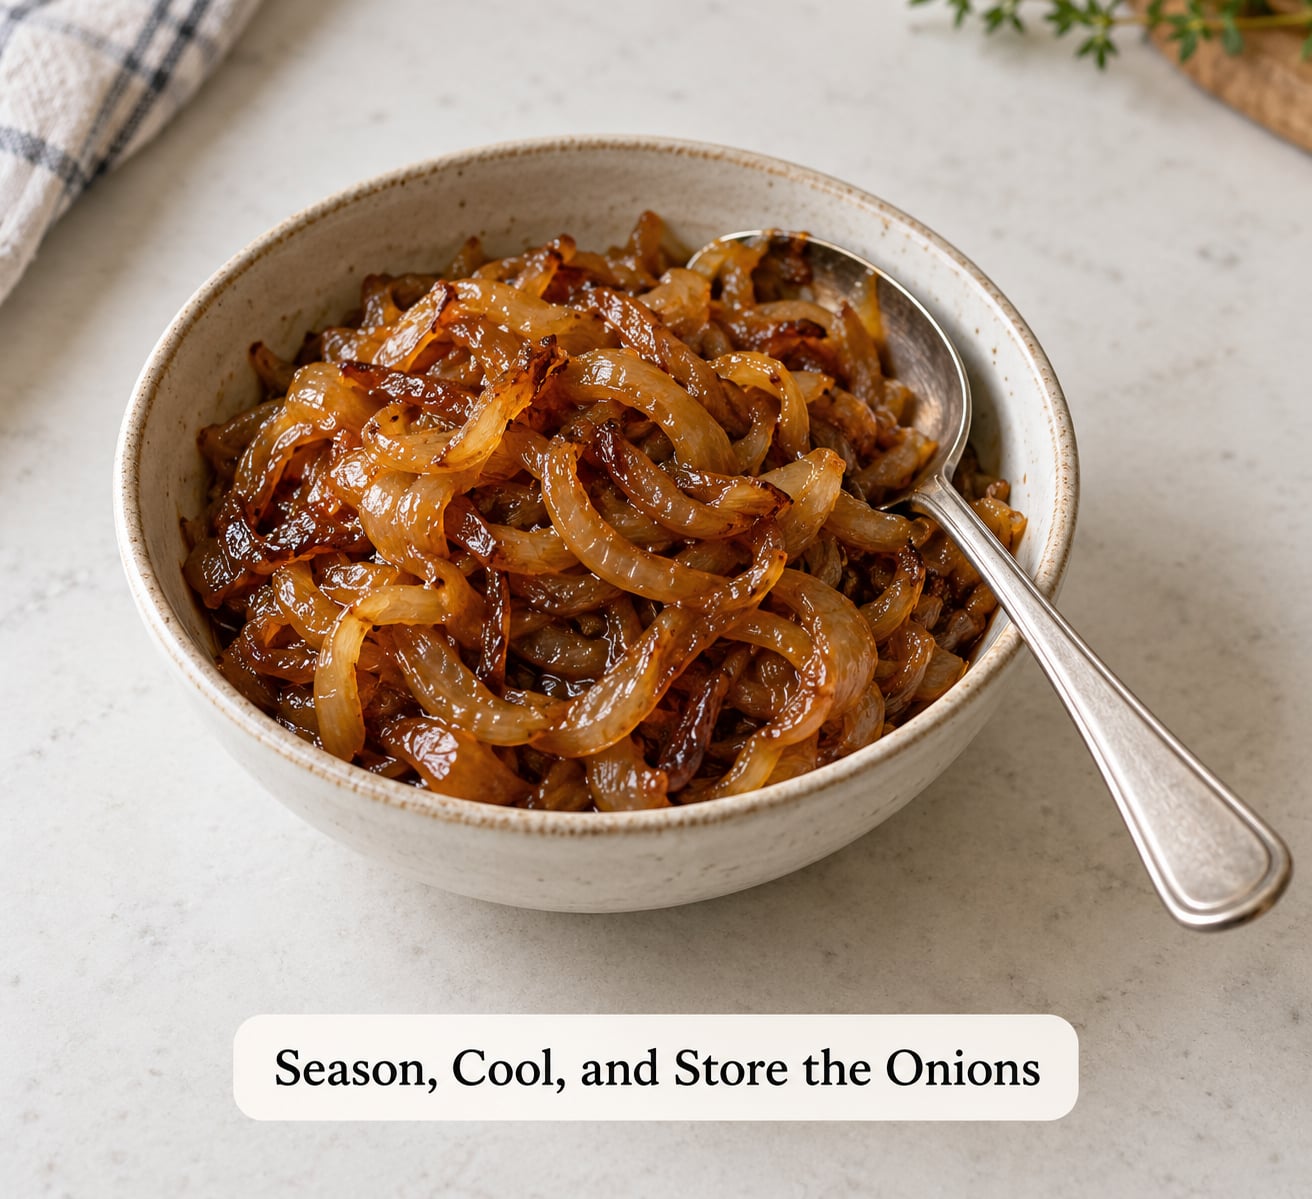
Taste before you salt further, since the brown sugar and the onions themselves already carry plenty. Season with a pinch of kosher salt and a few grinds of black pepper off the heat. Serve warm, or cool them on a plate before they go near a container, since steam trapped on top is what makes a batch soggy by morning.
Store leftovers in an airtight container in the fridge for 3 to 4 days. For longer keeping, spread them flat on a lined tray to freeze solid, then transfer to a bag or a divided ice cube tray and freeze for up to three months. They freeze well, which is handy for a cookout where you would rather not run a low flame for an hour while the guests are outside.
How They Belong on the Burger
Pile them on under or over the cheese, right after the patty comes off the heat. Cheese melt is a good shortcut here. A slice of Swiss or Gouda laid on the onions for the last thirty seconds of cheeseburger time picks up their sweetness and softens into the patty.
What you need on the onions is something acidic to cut the sugar. Mayonnaise thinned with a spoon of Dijon mustard, Dijonnaise, is the strongest pairing. Mayo with a splash of Worcestershire sauce works, and a barbecue glaze applied after the onions go on gives you a smokier, sweeter result than it does on a bare patty.
You can also fold the caramelized onions straight into the beef before you form patties, about two tablespoons per pound. It seasons the burger from the inside out. I prefer piling them on top, because folding them in burns some of that fond flavor during the patty sear and you end up with onion filling rather than distinct strands.
Common Mistakes
It is browning way too fast. The heat is too high. Move the burner to low, and if it is already dark in patches, add a quarter cup of water and stir. The onions will soften first and pick up color again once the water is gone.
The onions are pale and bitter at once. That combination means the pan got dry and the sugars hit the hot metal, then you stirred them back into the batch. Watch the bottom of the pan more than the color of the onions, and deglaze earlier rather than later.
The slices are uneven. Thick wedges cook slower than thin ends, so no single removal time works. Cut against a flat surface rather than holding the onion in your hand, which is where most wobble and thickness variation comes from.
The pan is crowded. More than two large onions in a 12-inch skillet creates a steam bath. The onions release water, that water cannot evaporate, and you end up with boiled onions. Cook in batches instead of piling the pan.
The finished onions are watery. Two fixes, both easy. Salt at the end rather than the start, and let the batch reduce a couple of extra minutes uncovered once the liquid is gone. If you salted early, salt pulls moisture out of the onion cells by osmosis, which speeds the softening but slows the drying and the browning.
They went bitter or burnt. There is no good rescue here. Pull off any blackened pieces, and cut the bitterness with a splash of water, stock or vinegar, which gives you a sharper result rather than a sweeter one. Next time, pull them a minute earlier than feels right.
Why is it taking so long? Six causes cover almost every case: the pan is too small, the heat is too high so you are fighting the pan rather than waiting on it, the slices are too thick, you forgot the oil, you left the onions unsalted, or you stirred so often that nothing ever sat long enough to brown. Cooks also report routinely losing time to a pan that dried out and needed scraping, which is a sign the fat was too little for the batch.
A couple of shortcuts are worth knowing. A pinch of baking soda raises the onion’s pH and breaks the process down in roughly 15 minutes, at the cost of softer texture and a color that leans orange instead of brown. Grilled onions are a different dish entirely, seared over high heat in 8 to 12 minutes with char marks, browned through the Maillard reaction rather than caramelized slowly through pyrolysis. Same onion, different mechanism, different result.
Frequently Asked Questions
How long do caramelized onions take for burgers?
Expect 45 to 60 minutes of cooking for two large onions in a 12-inch skillet, plus about 10 minutes of prep. Most of that time is hands-off, with a stir every ten minutes, so you can be doing other kitchen work while it runs. Thick wedges, a smaller pan or a crowded skillet can stretch it toward 75 minutes. Pull the onions at a deep golden brown rather than waiting for them to darken further.
Can I make caramelized onions without sugar?
Yes, and the sugar is optional anyway. Onions contain enough natural sugar to caramelize on their own, which is the whole point of cooking them slowly until their own sugars break down. Brown sugar adds a darker, more molasses-like note and helps push a slow batch along, but a batch with no added sugar still lands properly golden and sweet. Add it around the 30 minute mark if you want it.
What is the best onion to use for burgers?
Yellow onions are the all-rounder and the standard choice, because they have the balance of sugar and pungency that caramelizes well. Vidalia or Walla Walla onions go sweeter and softer, which is the safer pick when feeding people who claim they do not like onions. Red onions are mild and look good but turn muddy brown, and shallots cook faster so cut the batch time in half. Two varieties mixed together also works.
How do I keep caramelized onions from burning?
Keep the heat at medium-low, cut the butter with an equal amount of oil for a higher smoke point, and leave the pan alone for ten minutes at a time instead of stirring constantly. Watch the bottom of the skillet rather than the color of the onions, since fond catches before the strands darken. If the pan looks dry, add a quarter cup of water and scrape, which steams the fond loose before it turns bitter.
Can I make caramelized onions ahead of time?
That is the easiest way to use them. Make a batch up to 3 to 4 days ahead, cool it fully on a plate so no steam gets trapped, then refrigerate it airtight. Warm it in a hot pan for a minute with a splash of stock before it goes on the burger. For longer keeping, freeze it flat on a tray first, then bag it, or portion it in a divided ice cube tray for one to two tablespoons per serving.
Should I add caramelized onions before or after cooking the burger patties?
Add them after. Put them on once the patty is off the heat, under or over the cheese, so the onions warm through without scorching and stay as distinct strands. If you fold them into the raw beef, plan on about two tablespoons per pound, which seasons the burger from the inside but loses some of that slow-cooked flavor to the sear. A slice of Swiss or Gouda on top for the last 30 seconds is enough to soften.
Conclusion
Slice the onions evenly so they cook at the same rate, give them a wide skillet so nothing steams, hold the heat at medium-low and leave them alone for ten minutes at a time. That is how to make caramelized onions for burgers that come out deep gold and jammy instead of scorched. Pull them a shade before the color looks right, deglaze the fond if the pan dries, and start the batch a day or two ahead if you would rather not babysit it while the grill is going.